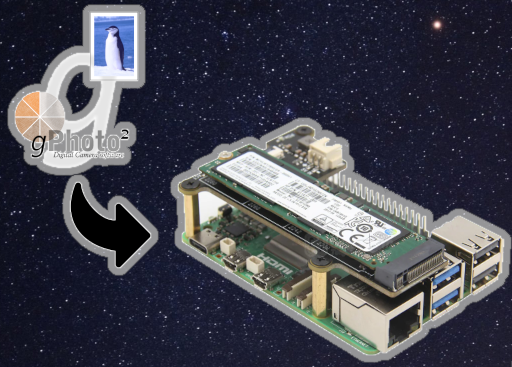
Astrophotography offers a window into the beauty of the night sky, capturing celestial events and the motion of stars over time. With the advent of affordable single-board computers like the Raspberry Pi 5, enthusiasts can create sophisticated time lapse astrophotography setups.
gPhoto2 is an open-source software that provides users with a robust set of tools for controlling and managing digital cameras from the command line. It supports a wide range of digital cameras, including DSLRs, mirrorless, and compact cameras. The software enables users to perform various tasks such as capturing images, downloading photos, configuring camera settings, and more, all without the need for the camera’s native software.
This guide will walk you through installing and using gphoto2 on a Raspberry Pi 5 for stunning time lapse astrophotography.
This article describes a procedure to install software on a Raspberry Pi 5 with 8G RAM running Raspberry Pi OS (64-bit) (Debian v.12 bookworm) booted directly from a 1TB NVMe SSD PCIe drive. This procedure may work for other configurations, so please do let us know if it does, or tell us about any issues you faced and your configuration. Thanks!
Prerequisites
- Raspberry Pi 5 board with Raspberry Pi OS (or any other compatible operating system) installed and configured.
- For the best possible performance, check out how to Turbocharge Your Raspberry Pi 5: Booting from NVMe SSD.
- Stable internet connection for downloading software packages.
- Basic familiarity with the Raspberry Pi environment, including how to open a terminal and run commands.
Step 1: Prepare Your Raspberry Pi 5
Begin by ensuring that your Raspberry Pi 5 is up to date. Open a terminal or SSH session and run the following commands:
sudo apt update && sudo apt upgrade
This will update the package lists and upgrade any installed packages to their latest versions.
Step 2: Install gPhoto2
gPhoto2 is a powerful tool for controlling cameras via the command line. Here’s how to install it:
sudo apt install gphoto2 -y
Verify the installation:
gphoto2 --version
Step 3: Connecting a DSLR Camera
Use a USB cable to connect your camera to the Raspberry Pi, ensuring the camera is set to the correct mode (e.g., manual mode for most DSLRs), then run the following command to ensure your camera is detected:
gphoto2 --auto-detect
You should see your camera listed with its model and port.
Step 4: Configuring gPhoto2 for Time Lapse
It’s a good practice to store your images in a dedicated directory:
mkdir ~/timelapse
cd ~/timelapse
gPhoto2 comes with many configuration options, the sections for which are listed with the following command:
gphoto2 --list-config
The specific configuration choices for each section are listed with the following command e.g.:
gphoto2 --get-config /main/capturesettings/shutterspeed
or simply:
gphoto2 --get-config shutterspeed
Once you know which configuration choices you want to use, such as ISO, shutter speed, and aperture, you can go ahead and change them:
gphoto2 --set-config iso=800
gphoto2 --set-config shutterspeed=30
gphoto2 --set-config aperture=8T
Many more commands options are available and are documented in the gPhoto2 CLI reference.
There is a known issue whereby the desktop environment will already have a claim on the camera, and specifically any SD storage card therein, so it can be accessed as a storage device from file system explorer. This results in an error when issuing the commands above:
*** Error ***
An error occurred in the io-library ('Could not claim the USB device'): Could not claim interface 0 (Device or resource busy). Make sure no other program (gvfs-gphoto2-volume-monitor) or kernel module (such as sdc2xx, stv680, spca50x) is using the device and you have read/write access to the device.
This is solved by removing the SD card, or by killing the processes making the claim:
ps aux | grep gphoto2

ian         1349  0.0  0.1 255776 12896 ?        Ssl  09:24   0:00 /usr/libexec/gvfs-gphoto2-volume-monitor
ian         3620  0.0  0.1 598832 15936 ?        Sl   10:24   0:00 /usr/libexec/gvfsd-gphoto2 --spawner :1.13 /org/gtk/gvfs/exec_spaw/1
ian         3702  0.0  0.0   6088  1920 pts/0    S+   10:39   0:00 grep --color=auto gphoto2

sudo kill 1349
sudo kill 3620
Step 5: Start the Time Lapse Capture
With your camera configured, use gPhoto2 to capture images at regular intervals. For instance, to capture an image every 60 seconds for 2 hours:
gphoto2 --capture-image-and-download --interval 60 --frames 120
Step 6: Automating with a Script
Creating a shell script simplifies the process and allows for easy modifications. Open a text editor and create a file named timelapse.sh:
nano timelapse.sh
Add the following script:
#!/bin/bash
mkdir -p ~/timelapse
cd ~/timelapse
gphoto2 --set-config iso=1600
gphoto2 --set-config shutterspeed=30
gphoto2 --set-config aperture=0
gphoto2 --capture-image-and-download --interval 60 --frames 120
Run the following command to make your script executable:
chmod +x timelapse.sh
Start your time lapse by running:
./timelapse.sh
Step 7: Processing Your Time Lapse
Once you’ve captured your images, you can compile them into a video using software like ffmpeg:
sudo apt install ffmpeg -y
Navigate to your directory and run:
ffmpeg -framerate 24 -pattern_type glob -i '*.jpg' -c:v libx264 -pix_fmt yuv420p timelapse.mp4
This command creates a time lapse video (timelapse.mp4) from your captured images at 24 frames per second.
Result
This is an example of a two hour timelapse compressed into thirty seconds using the technique described above:
Camera used was a Canon EOS 80D, 24mm wide lens with night filter.
Conclusion
With gPhoto2 and a Raspberry Pi 5, you can automate the capture of beautiful night sky images, creating mesmerizing time lapse videos of the cosmos. Experiment with different settings and intervals to find the perfect combination for your astrophotography projects. Clear skies and happy shooting!
