Integrating a BME280 sensor into INDI-AllSky is a great way to enhance your setup. This sensor provides accurate readings of temperature, humidity, and atmospheric pressure, making it an excellent addition to your Raspberry Pi 5-based all-sky camera.
This guide will walk you through the process of connecting a BME280 sensor to a Raspberry Pi 5 and integrating it with INDI-AllSky to monitor weather conditions.
Prerequisites
- Raspberry Pi 5 board with Raspberry Pi OS (or any other compatible operating system) installed and configured.
- For the best possible performance, check out how to Turbocharge Your Raspberry Pi 5: Booting from NVMe SSD.
- Stable internet connection for downloading software packages.
- Basic familiarity with the Raspberry Pi environment, including how to open a terminal and run commands.
- INDI-AllSky installed and running or check out how to Install INDI-AllSky on a Raspberry Pi 5.
- A BME280 sensor with I2C addressing, using addresses 0x76 (default) or 0x77.
- Jumper wires to connect the BME280 sensor to the Raspberry Pi 5’s GPIO pins.
- Python 3, which is pre installed with all latest Raspberry Pi 5s.
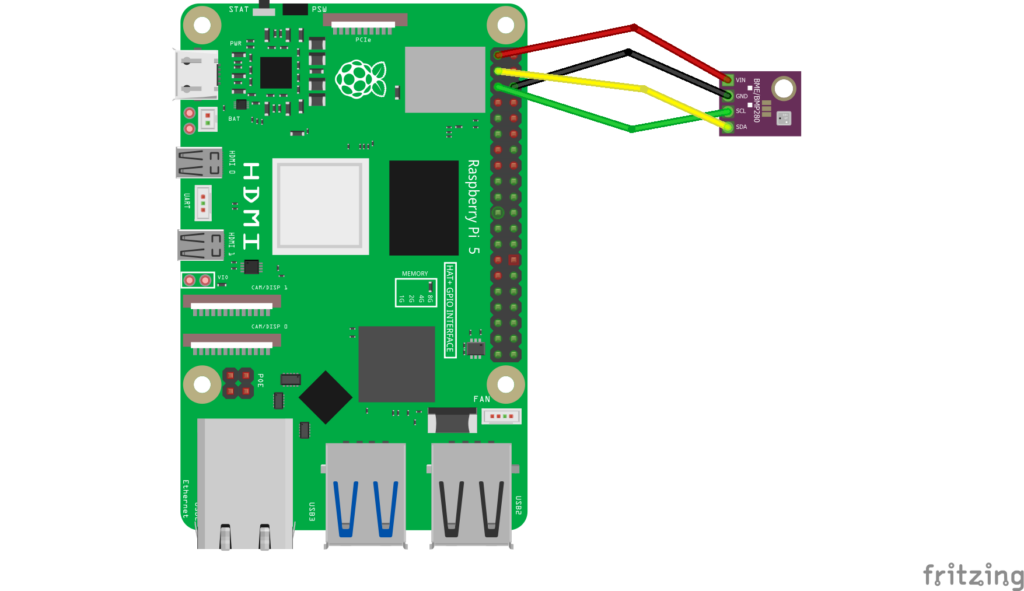
Step 1: Wiring the BME280 to the Raspberry Pi 5
The BME280 communicates using either I2C or SPI, but for simplicity, we’ll use I2C.
| BME280 Pin | Raspberry Pi 5 Pin |
|---|---|
| VIN (VCC) | 3.3V (Pin 1) |
| GND | GND (Pin 6) |
| SCL | GPIO 3 (Pin 5) |
| SDA | GPIO 2 (Pin 3) |
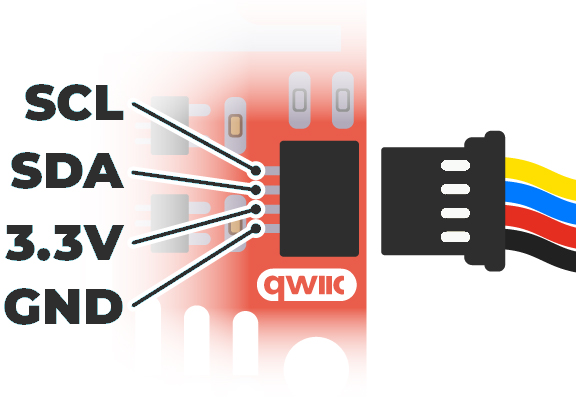
The BME280 can also be wired to a 4-pin JST SH 1.0mm plug for compatibility with HATS supporting SparkFun’s QWIIC Connect System, such as the SkyCamOne HAT from Titan Astro:
Once wired, ensure I2C is enabled on your Raspberry Pi:
sudo raspi-config
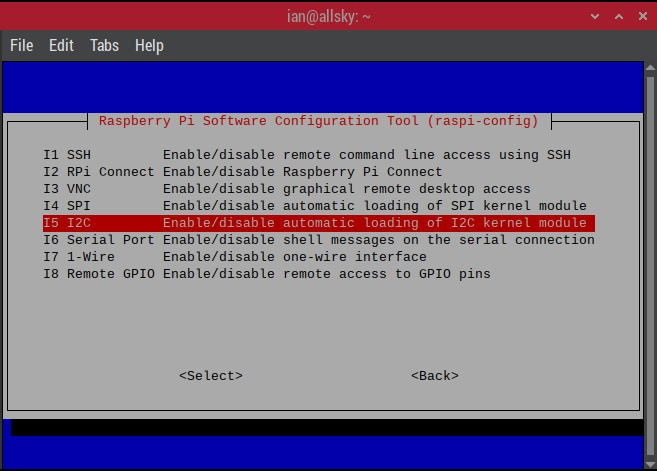
Select Interface Options:
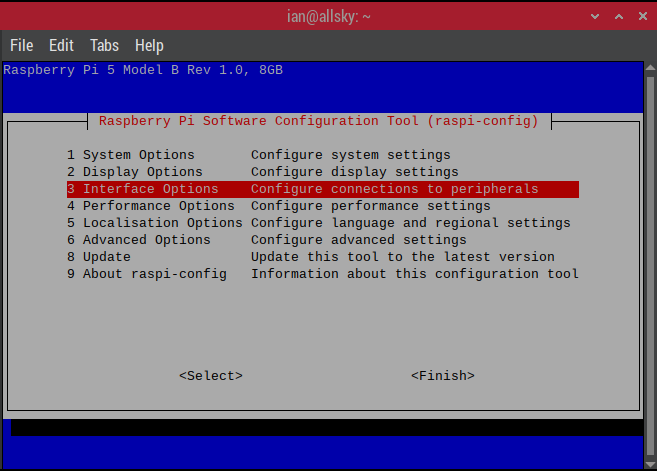
Select I2C:
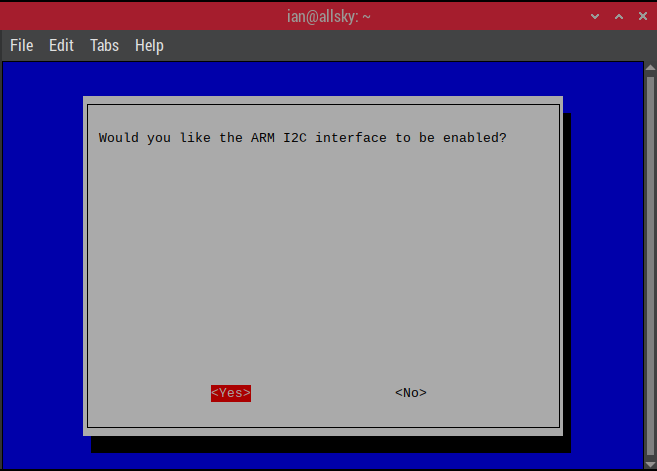
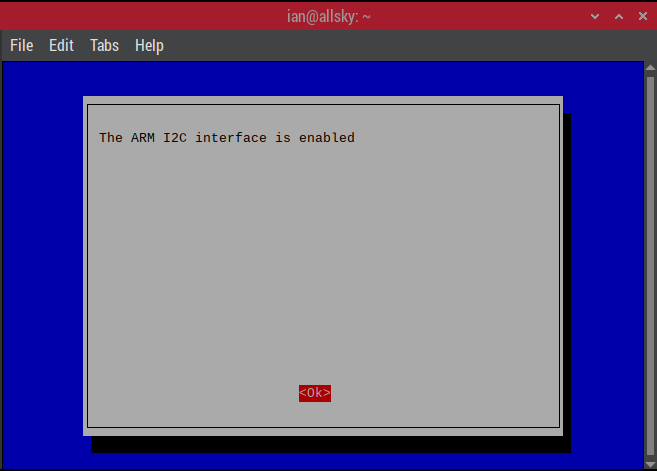
Enable the ARM I2C interface:
Step 2: Installing Required Libraries
Begin by ensuring that your Raspberry Pi 5 is up to date. Open a terminal or SSH session and run the following commands:
sudo apt update && sudo apt upgrade
Your Raspberry Pi 5 will likely have the I2C tools already installed, but we can check just in case:
sudo apt install i2c-tools
Check if the BME280 is detected:
sudo i2cdetect -y 1
This command generates a grid of detected I2C devices. You should see an entry with hex address 76 or 77 for typical BME280 devices:
     0  1  2  3  4  5  6  7  8  9  a  b  c  d  e  f
00:                         -- -- -- -- -- -- -- --
10: -- -- -- -- -- -- -- -- -- -- -- -- -- -- -- --
20: -- -- -- -- -- -- -- -- -- -- -- -- -- -- -- --
30: -- -- -- -- -- -- -- -- -- -- -- -- -- -- -- --
40: -- -- -- -- -- -- -- -- -- -- -- -- -- -- -- --
50: -- -- -- -- -- -- -- -- -- -- -- -- -- -- -- --
60: -- -- -- -- -- -- -- -- -- -- -- -- -- -- -- --
70: -- -- -- -- -- -- 76 --
Step 3: Reading BME280 Sensor Data with Python
A virtual environment allows you to create an isolated space for your Python projects, preventing package conflicts. Navigate to your project directory and create a virtual environment:
mkdir -p ~/Projects/bme280
cd ~/Projects/bme280
python -m venv bme280-env
Activate the virtual environment:
source bme280-env/bin/activate
Install the Python libraries we will use in our script:
pip install adafruit-circuitpython-bme280
Create a Python script to read data from the BME280:
nano bme280_test.py
Add the following code, setting the I2C address for your BME280 that was detected above:
import board
import time
from adafruit_bme280 import basic as adafruit_bme280

# Create sensor object, using the board's default I2C bus.
i2c = board.I2C()   # uses board.SCL and board.SDA
bme280 = adafruit_bme280.Adafruit_BME280_I2C(i2c, address=0x76)

# change this to match the location's pressure (hPa) at sea level
bme280.sea_level_pressure = 1013.25

while True:
    print("\nTemperature: %0.1f C" % bme280.temperature)
    print("Humidity: %0.1f %%" % bme280.relative_humidity)
    print("Pressure: %0.1f hPa" % bme280.pressure)
    time.sleep(5)
Save and run the script:
python bme280_test.py
If everything is working, you’ll see the temperature, humidity, and pressure readings output every 5 seconds:
Temperature: 22.4 C
Humidity: 31.8 %
Pressure: 1026.1 hPa
Step 4: Integrating BME280 with INDI-AllSky
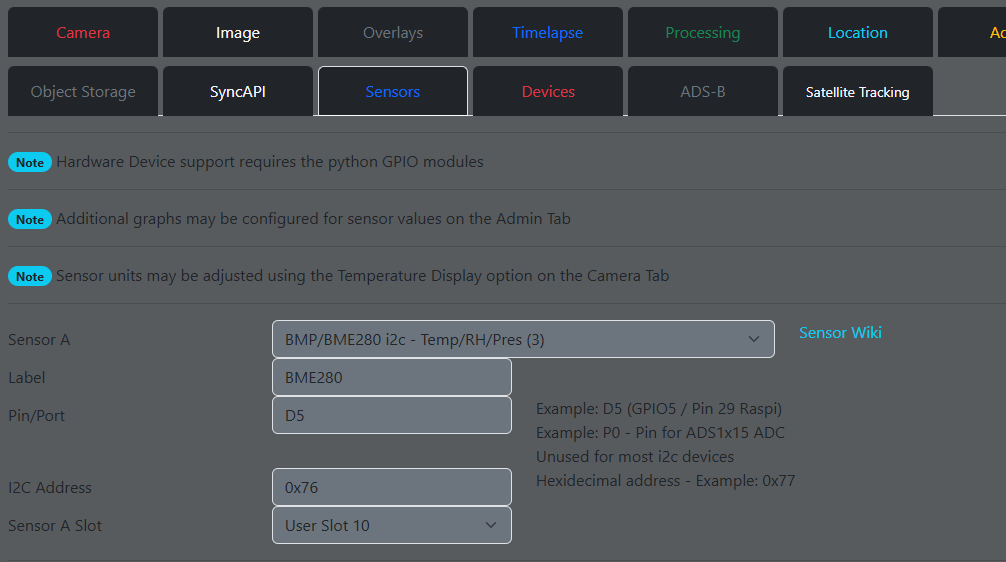
Now, let’s add this data to INDI-AllSky so it can be displayed alongside your all-sky images. Use your web browser to navigate to your INDI-AllSky configuration page and login if needed. From the list of configuration options, click on Sensors.
Select an unused sensor A, B, or C, then from the drop-down select BMP/BME280 i2c - Temp/RH/Pres (3).
Provide a Label such as BME280 then set the I2C Address to the same detected above, using hexadecimal notation, e.g. 0x76. Assign a sensor slot if you plan to chart the values returned from the sensor:
Trigger the Reload on Save switch then Save your new configuration.
After a minute or two, the configuration is reloaded and the readings from you BME280 are available. You can check if all is well by looking into the logs from the Tools -> Log menu on the left side, then looking for the sensor entry:
2025-02-15T10:27:16.249745+01:00 allsky [INFO] Sensor-4-23326/MainThread tempSensorBme280.update() [25]: [BME280] BME280 - temp: 22.7c, humidity: 30.8%, pressure: 1025.9hPa
Step 5: Including BME280 Sensor Data in Image Overlays
Adding the BME280 sensor data to images is managed through the Overlays configuration page:
The three sensor slots A, B, and C, give access to user slots 10, 15, and 20 respectively, with each sensor slot capable of providing up to five readings each. The BME280 sensor provide three readings, which we can access through user slots 10, 11, and 12 when attached to sensor slot A.
We add these three readings to the label template, in whatever style and position you choose. For illustration purposes, we will add directly to the end of the default values, in the top left position, annotating accordingly:
Temperature {sensor_user_10:0.0f}°C
Humidity {sensor_user_11:0.0f}%
Pressure {sensor_user_12:0.0f}Pa
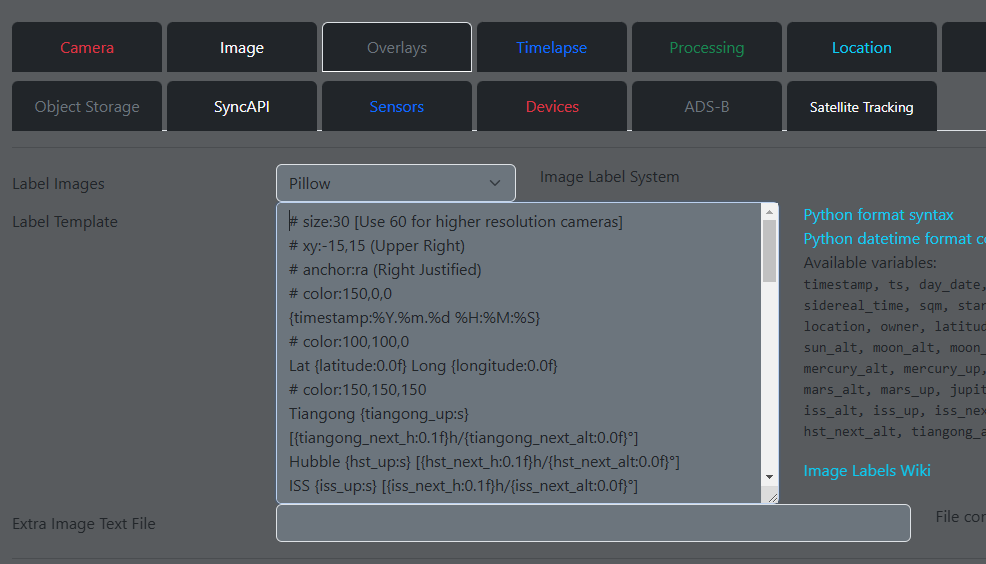
The complete Label Template is now:
# size:30 [Use 60 for higher resolution cameras]
# xy:-15,15 (Upper Right)
# anchor:ra (Right Justified)
# color:150,0,0
{timestamp:%Y.%m.%d %H:%M:%S}
# color:100,100,0
Lat {latitude:0.0f} Long {longitude:0.0f}
# color:150,150,150
Tiangong {tiangong_up:s} [{tiangong_next_h:0.1f}h/{tiangong_next_alt:0.0f}°]
Hubble {hst_up:s} [{hst_next_h:0.1f}h/{hst_next_alt:0.0f}°]
ISS {iss_up:s} [{iss_next_h:0.1f}h/{iss_next_alt:0.0f}°]
# xy:-15,-240 (Lower Right) [Use -15,-450 for size 60]
# color:175,175,0
Sun {sun_alt:0.0f}°
# color:125,0,0
Mercury {mercury_alt:0.0f}°
# color:100,150,150
Venus {venus_alt:0.0f}°
# color:150,0,0
Mars {mars_alt:0.0f}°
# color:100,100,0
Jupiter {jupiter_alt:0.0f}°
# color:100,100,150
Saturn {saturn_alt:0.0f}°
# color:150,150,150
Moon {moon_phase:0.0f}% {moon_alt:0.0f}°
# xy:15,-120 (Lower Left)  [Use 15,-210 for size 60]
# anchor:la (Left Justified)
# color:0,150,150
Stars {stars:d}
# color:150,50,50
Kp-index {kpindex:0.2f}
# color:150,150,150
Smoke {smoke_rating:s}
# xy:15,15 (Upper Left)
# color:0,150,0
Exposure {exposure:0.6f}
# color:150,50,0
Gain {gain:d}
# color:50,50,150
Camera {temp:0.1f}°{temp_unit:s}
# color:150,0,150
Stretch {stretch:s}
Stacking {stack_method:s}
# color:200,200,200 (default color)
# additional labels will be added here
Temperature {sensor_user_10:0.0f}°C
Humidity {sensor_user_11:0.0f}%
Pressure {sensor_user_12:0.0f}Pa
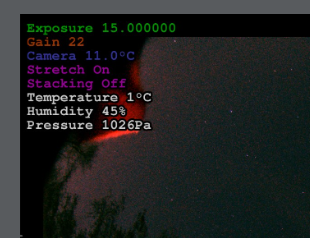
After saving and reloading the configuration, our image now shows our BME280 sensor values:
Conclusion
By integrating a BME280 sensor with your Raspberry Pi 5 and INDI-AllSky, you can enhance your all-sky camera with real-time environmental monitoring. This is especially useful for astronomy projects where temperature, humidity, and pressure variations impact observations.
Clear skies!