Are you an astronomy enthusiast looking to take your stargazing to the next level? Perhaps you want to automate your telescope or set up a remote observatory? If so, building your own astronomy server could be the perfect solution. In this guide, we’ll walk you through the process of installing INDIGO. INDIGO is a popular open-source automation system for astronomy, which you can install on a Raspberry Pi 5.
What is INDIGO?
Developers designed INDIGO as a versatile software platform for automating astronomy equipment such as telescopes, cameras, and observatories. It provides a framework for controlling various devices and orchestrating complex tasks. This makes it an invaluable tool for both amateur and professional astronomers.
This article describes the procedure to install software onto a 64-bit Raspberry Pi 5 with 8GB RAM running Debian GNU/Linux 12 (bookworm) which is booted from a 1TB NVMe SSD drive. This may work fine for other configurations, so please do let us know if it does, or tell us about any issues you faced and detail your configuration. Thanks!
Prerequisites
- Raspberry Pi 5 board with Raspberry Pi OS (or any other compatible operating system) installed and configured.
- For the best possible performance, check out how to Turbocharge Your Raspberry Pi 5: Booting from NVMe SSD.
- Stable internet connection for downloading software packages.
- Basic familiarity with the Raspberry Pi environment, including how to open a terminal and run commands.
Step 1: Add the INDIGO Repository to the Repository Sources
The user downloads the INDIGO package from a repository that they must add to the Advanced Packaging Tool (APT) repository sources list. The user adds the repository source definition as a new file in the sources lists directory using the following command:
sudo nano /etc/apt/sources.list.d/indigo.list
Add the main package repository location to the file:
deb [trusted=yes] https://indigo-astronomy.github.io/indigo_ppa/ppa indigo main
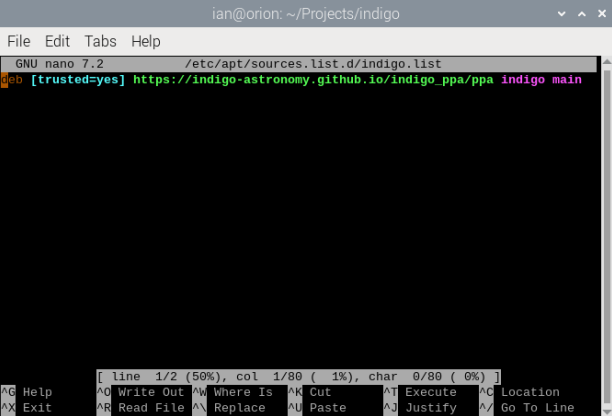
Save and exit with Control + O and Control + X.
Step 2: Update Your Raspberry Pi
Begin by ensuring your Raspberry Pi 5 is up to date. Open a terminal window and run the following commands:
sudo apt update && sudo apt upgrade
This will update the package lists. It will also upgrade any installed packages to their latest versions, including the newly added INDIGO package repository.
Step 3: Install INDIGO Server
Once you update the package lists, you can install INDIGO by executing the following command:
sudo apt install indigo
Step 4: Launch INDIGO Server
With INDIGO successfully installed, you can check the server version and configuration. Start in verbose logging mode using the following command in the terminal:
indigo_server -v
21:13:38.656646 indigo_server: INDIGO server 2.0-278 built on 2024-03-31T10:33:50+00:00 production
21:13:38.758607 indigo_server: Loading driver list from /usr/share/indigo/indigo_linux_drivers
21:13:38.758693 indigo_server: Loading driver list from /usr/share/indigo/indigo_drivers
21:13:38.759116 indigo_server: Server attached
21:13:38.759175 indigo_server: Server started on port 7624
21:13:38.763161 indigo_server: Service registered as orion
You can also start the server with an initial list of the device drivers. However, this isn’t necessary as you can store and load drivers in configuration using the optional GUI Control Panel Utility or through the in-built Web Control Panel:
indigo_server -v indigo_ccd_simulator indigo_mount_simulator indigo_rotator_simulator
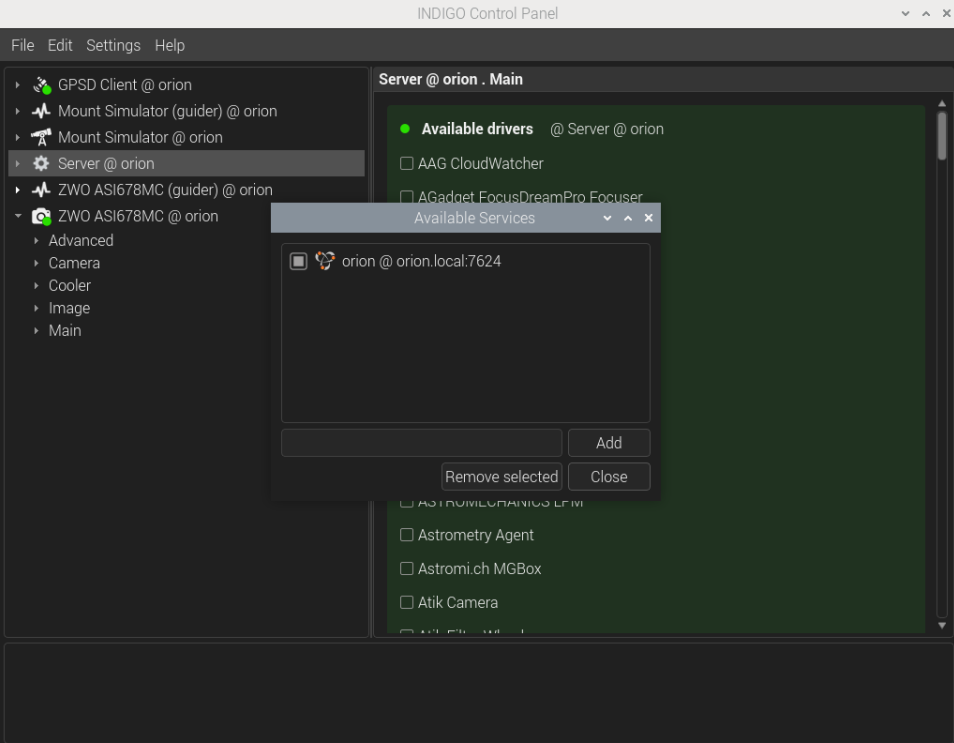
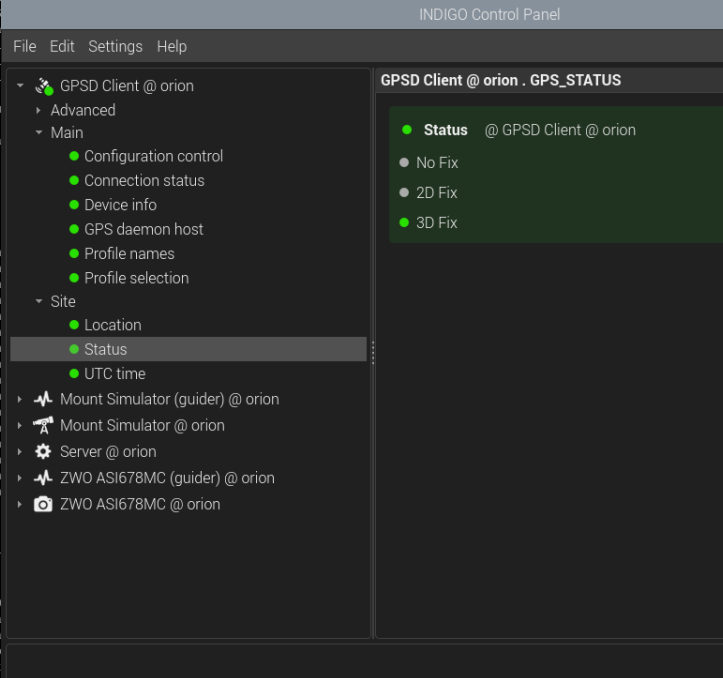
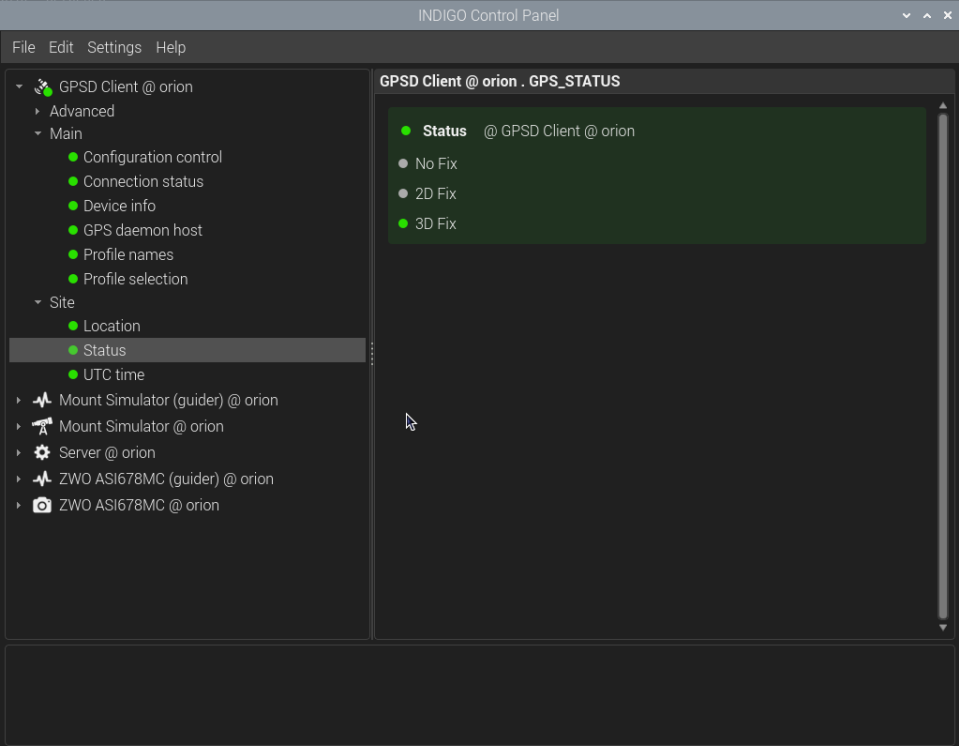
Step 5: Installing INDIGO GUI Control Panel
INDIGO Control Panel is a GUI tool for managing and configuring INDIGO Infrastructure. It is optionally installed by executing the following command:
sudo apt install indigo-control-panel
This adds an INDIGO Control Panel entry to the desktop environment application menu. Alternatively, it can be launched from a command line in the terminal:
indigo-control-panel
With INDIGO Server already running, and with some device drivers loaded, you can now view and manage the status of your devices. You can add and remove devices, and connect to other systems running INDIGO server:
Step 6: Using the INDIGO WebGUI Control Panel
INDIGO Server comes equipped with a web-based control panel. It is accessible from any web browser with a connection to the Raspberry Pi 5. The default web server port is 7624. Simply point your browser to that port, on localhost if accessing from the same system, or using the Raspberry Pi 5’s hostname if accessing from elsewhere on your network:
http://localhost:7624/


Step 7: Enjoy Stargazing!
With INDIGO up and running on your Raspberry Pi 5, you now have a powerful astronomy server. It is capable of automating your stargazing sessions. Whether you’re capturing images of distant galaxies or tracking the movements of planets, INDIGO provides the necessary tools. It allows you to take your astronomy hobby to new heights.
So, gather your equipment, set up your Raspberry Pi, and get ready to explore the wonders of the universe like never before. Happy stargazing!
Installing INDIGO on a Raspberry Pi 5 opens up a world of possibilities for astronomy enthusiasts. With its ease of installation and powerful features, it’s the perfect way to automate your observatory. You can take your stargazing to the next level.