The Raspberry Pi 5, with its improved processing power and versatility, opens up a world of possibilities for astrophotography enthusiasts. One such possibility is installing PHD2, a popular guiding software used by amateur astronomers for precise tracking during long-exposure astrophotography. In this guide, we’ll walk you through the steps to install PHD2 on your Raspberry Pi 5, turning it into a capable guiding platform for your telescope.
This article describes a procedure to install software on a Raspberry Pi 5 with 8G RAM running Raspberry Pi OS (64-bit) (Debian v.12 bookworm) booted directly from a 1TB NVMe SSD PCIe drive. This procedure may work for other configurations, so please do let us know if it does, or tell us about any issues you faced and your configuration. Thanks!
Prerequisites
- Raspberry Pi 5 board with Raspberry Pi OS (or any other compatible operating system) installed and configured.
- For the best possible performance, check out how to Turbocharge Your Raspberry Pi 5: Booting from NVMe SSD.
- Stable internet connection for downloading software packages.
- Basic familiarity with the Raspberry Pi environment, including how to open a terminal and run commands.
- INDI server version 2 or higher installed and tested. This is described in our guide Harnessing Astronomy with Raspberry Pi 5: Installing INDI for Stellar Exploration
Step 1: Prepare Your Raspberry Pi 5
Begin by ensuring that your Raspberry Pi 5 is up to date. Open a terminal or SSH session and run the following commands:
sudo apt update && sudo apt upgrade
This will update the package lists and upgrade any installed packages to their latest versions.
Step 2: Build PHD2 from Source Code
We want to be sure that we build PHD2 from the latest packages that work properly with the INDI server when we build the latter from source. The latest PHD2 source requires INDI server v2 or higher, which our guide shows you how to install. To start the PHD2 build process, we first need to install some prerequisites:
sudo apt install build-essential git cmake pkg-config libwxgtk3.2-dev \
   wx-common wx3.2-i18n libnova-dev gettext zlib1g-dev libx11-dev \
   libcurl4-gnutls-dev libeigen3-dev libgtest-dev
Create a project directory to download the source into:
mkdir ~/Projects
cd ~/Projects
Download the source code from the official PHD2 repository on GitHub. We will use a shallow clone to speed things up and save space:
git clone --depth 1 https://github.com/OpenPHDGuiding/phd2.git
Note, there is currently a bug in the PHD2 master branch which throws a build error when handling the icon files. We recommend reverting to the most recent release build, which at this moment is release/v2.6.13, by adding the branch identifier to the clone command:
git clone -b release/v2.6.13 --depth 1 https://github.com/OpenPHDGuiding/phd2.git
Build the code:
mkdir -p ~/Projects/phd2/tmp
cd ~/Projects/phd2/tmp
cmake -DUSE_SYSTEM_LIBINDI=1 -DCMAKE_INSTALL_PREFIX=/usr -DCMAKE_BUILD_TYPE=Debug ~/Projects/phd2
make -j4
sudo make install
PHD2 is now installed. The version can be found by entering the command:
phd2 --version
2.6.13
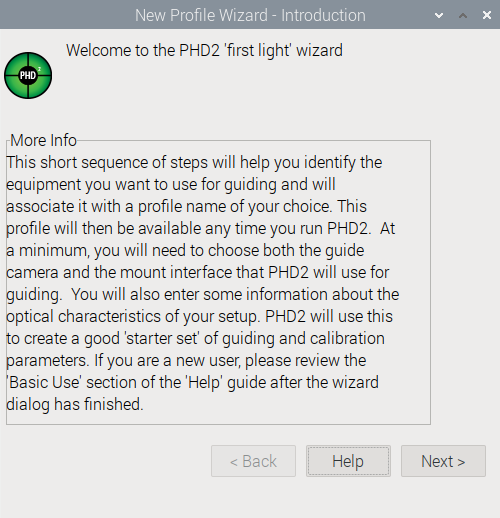
Step 3: Launch PHD2
Once the installation is complete, you can launch PHD2 from the Applications menu on your Raspberry Pi 5. Alternatively, you can launch it from the terminal by running the following command:
phd2
Conclusion:
With PHD2 installed on your Raspberry Pi 5, you now have a powerful guiding solution for your astrophotography endeavors. Whether you’re capturing images of distant galaxies or tracking the movement of celestial objects, PHD2 running on the Raspberry Pi 5 offers a convenient and reliable platform for precise guiding. Enjoy exploring the cosmos with your newly configured setup!
i’m having a problem building PHD2. I followed the instructions and when trying to build the code I get this:
davidjkreiton@raspberrypi:~/Projects/phd2/tmp $ cmake -DUSE_SYSTEM_LIBINDI=1 -DCMAKE_INSTALL_PREFIX=/usr -DCMAKE_BUILD_TYPE=Debug ~/Projects/phd2
— PHD2 version ‘2.6.13’ (extracted from source)
— Using system’s CFITSIO.
— using libcurl /usr/lib/aarch64-linux-gnu/libcurl.so
— Using system’s Eigen3.
— Using system’s libindi
— INDI version 1.9.9 found in /usr/include/libindi, but at least version 2.0.0 is required
CMake Error at cmake_modules/FindINDI.cmake:136 (message):
INDI not found. Please install INDI and try again.
Call Stack (most recent call first):
thirdparty/thirdparty.cmake:598 (find_package)
CMakeLists.txt:122 (include)
— Configuring incomplete, errors occurred!
See also “/home/davidjkreiton/Projects/phd2/tmp/CMakeFiles/CMakeOutput.log”.
I looked at the .log file but could not make any sense of it as I have no real knowledge of how to build PHD2 and am just blindly following the instructions. FWiW if I type indiserver I get this:
davidjkreiton@raspberrypi:~/Projects/phd2/tmp $ indiserver
2024-05-08T17:45:23: startup: indiserver
Usage: indiserver [options] driver [driver …]
Purpose: server for local and remote INDI drivers
INDI Library: 2.0.7
Code 2.0.7-tgz. Protocol 1.7.
Options:
-l d : log driver messages to /YYYY-MM-DD.islog
-m m : kill client if gets more than this many MB behind, default 128
-d m : drop streaming blobs if client gets more than this many MB behind, default 5. 0 to disable
-u path : Path for the local connection socket (abstract), default /tmp/indiserver
-p p : alternate IP port, default 7624
-r r : maximum driver restarts on error, default 10
-f path : Path to fifo for dynamic startup and shutdown of drivers.
-v : show key events, no traffic
-vv : -v + key message content
-vvv : -vv + complete xml
What do I need to do to build PHD2?
Thank you for your help.
Best regards, David Kreiton
Hi David, it looks you have an older and incompatible version of libindi installed, as suggested by the error message:
INDI version 1.9.9 found in /usr/include/libindi, but at least version 2.0.0 is requiredDid you install libindi from the Debian package or using our guide?
Hi,
I ran into the same problem (indi 1.9.9 instead of 2.0.0), following your instructions to install the indi server from source, then installing phd2 from source. I suspect that installing the prerequisites per your instructions for phd2 which include “libindi-dev” is the culprit. When I recompiled/installed indi after installing the prerequisites for phd2, it worked except for the fact that I also needed to sudo apt-get install libopencv-dev before (on a freshly installed rpi5 with bookworm lite).
Cheers,
Karl
Hello, I just followed the whole process step by step. First I installed the INDI Server version 2 or higher as per your guide:
Harnessing Astronomy with Raspberry Pi 5: instalación de INDI para la exploración estelar
Everything went ok and the testing gave the following result:
pijavier@raspberrypi:~/Projects/phd2/tmp $ indiserver
2024-06-27T21:05:25: startup: indiserver
Usage: indiserver [options] driver [driver …]
Purpose: server for local and remote INDI drivers
INDI Library: 2.0.8
Code 2.0.8-tgz. Protocol 1.7.
Options:
-l d : log driver messages to /YYYY-MM-DD.islog
-m m : kill client if gets more than this many MB behind, default 128
-d m : drop streaming blobs if client gets more than this many MB behind, default 5. 0 to disable
-u path : Path for the local connection socket (abstract), default /tmp/indiserver
-p p : alternate IP port, default 7624
-r r : maximum driver restarts on error, default 10
-f path : Path to fifo for dynamic startup and shutdown of drivers.
-v : show key events, no traffic
-vv : -v + key message content
-vvv : -vv + complete xml
driver : executable or [device]@host[:port]
pijavier@raspberrypi:~/Projects/phd2/tmp $
As far as I understand the version is 2.0.8, then so far so good.
But when I compile PHD2 this is the result:
pijavier@raspberrypi:~/Projects/phd2/tmp $ cmake -DUSE_SYSTEM_LIBINDI=1 -DCMAKE_INSTALL_PREFIX=/usr -DCMAKE_BUILD_TYPE=Debug ~/Projects/phd2
— PHD2 version ‘2.6.13’ (extracted from source)
— Using system’s CFITSIO.
— using libcurl /usr/lib/aarch64-linux-gnu/libcurl.so
— Using system’s Eigen3.
— Using system’s libindi
— INDI version 1.9.9 found in /usr/include/libindi, but at least version 2.0.0 is required
CMake Error at cmake_modules/FindINDI.cmake:136 (message):
INDI not found. Please install INDI and try again.
Call Stack (most recent call first):
thirdparty/thirdparty.cmake:598 (find_package)
CMakeLists.txt:122 (include)
— Configuring incomplete, errors occurred!
See also “/home/pijavier/Projects/phd2/tmp/CMakeFiles/CMakeOutput.log”.
pijavier@raspberrypi:~/Projects/phd2/tmp $
So surprisingly it says:
— INDI version 1.9.9 found in /usr/include/libindi, but at least version 2.0.0 is required
INDI not found. Please install INDI and try again
Why finds version 1.9.9, if after executing “indiserver” it says is version 2.0.8?
What should I do to complete PHD2 installation?
Thanks
Javier
Hi Javier, the PHD2 installation checks the installed INDI version by looking at the header file in the include folder:
cat /usr/include/libindi/indiapi.h | grep INDI_VERSION#define INDI_VERSION_MAJOR 2
#define INDI_VERSION_MINOR 0
#define INDI_VERSION_RELEASE 7
Do you see something else? Do you find instances of indiapi.h in other folders?
sudo find / -name indiapi.hHi again, surprisingly I recompiled INDI and afterwards recompiled PHD2 ¡AND IT WORKS!
pijavier@raspberrypi:~/Projects/phd2/tmp $ phd2 –version
2.6.13dev4
pijavier@raspberrypi:~/Projects/phd2/tmp $
Hi, good to hear you got it working.
Hi again, now a different issue appears when running phd2 on Raspberry Pi 5. When connected to the ToupTek camera, GPCMOS02000KPA, it does not work. It allows connection, but que you try to execute the CONTINUOUS LOOP OF EXPOSURES FOR CENTERING AND FOCUS it fails. After 15+ seconds you get the message:
After 16 seconds camera has not completed the 1 second picture. Camera disconnected to prevent other problems. Check the troubleshooting section for help.
This can happen for a number of reasons, including having multiple applications trying to use the same camera at the same time. Do you use the camera for imaging and guiding? Do you use an INDI camera, and you have it connected in the INDI client, or in KStars/EKOS, and also in PHD2? If you continue to have problems then we would suggest you raise it with the PHD2 community (https://openphdguiding.org/getting-help/).