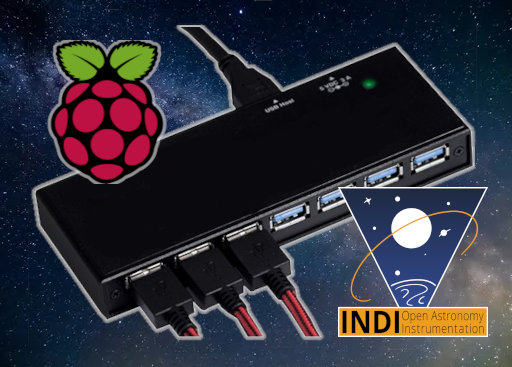
The Raspberry Pi 5 is a powerful tool for amateur astronomers, offering the capability to connect and control astronomy devices. Additionally, its USB naming conventions make it easy to identify and manage connected devices. By running software like INDI (Instrument Neutral Distributed Interface), you can automate and remotely control your astrophotography setup.
When you connect multiple USB devices to your Raspberry Pi, the system assigns them device nodes like /dev/ttyUSB0 or /dev/video0. The order in which devices are detected can change, causing inconsistencies in device assignment. For example, a camera that was /dev/video0 yesterday might become /dev/video1 today if the USB ports are switched or if another device is detected first. This can lead to issues when automating your setup, as INDI relies on consistent device assignment to function correctly.
What is INDI?
INDI (Instrument Neutral Distributed Interface) is an open-source protocol that enables the control of various astronomy hardware, including telescopes, cameras, focusers, and more. It abstracts device communication into a standardized interface, allowing multiple types of devices to be controlled by a single client (like KStars or Ekos). It’s particularly popular in Raspberry Pi-based astrophotography setups because it allows users to control their equipment over a network.
What is Udev?
Udev is the device manager for the Linux kernel, responsible for managing device nodes in the /dev directory. It dynamically detects and manages devices when they are plugged in or removed. In the context of a Raspberry Pi astronomy setup, udev is essential for identifying and configuring devices such as USB cameras, motorized focusers, and telescopes.
The challenge in a Raspberry Pi-based setup is ensuring that devices like your USB cameras and mounts are properly identified and assigned the correct drivers every time they are connected or restarted. This is where udev comes into play. By using udev rules, you can create a persistent mapping between the device and its identifier, such as by using the device’s serial number, manufacturer ID, or other unique attributes. This ensures that no matter how or when the device is connected, it always gets the correct name and settings.
Setting Up Udev Rules for INDI Devices
Here’s a step-by-step guide to setting up udev rules for astronomy devices on a Raspberry Pi 5 running INDI.
Step 1: Identify the Device
To create a udev rule, you first need to gather information about your connected device. Remove all plugged in devices then plug in the device you want to identify (e.g., a USB camera or telescope mount) and run the following command in the terminal to get details about it:
udevadm info --name=/dev/ttyUSB0 --attribute-walk
Replace /dev/ttyUSB0 with the actual path of your device. This command will output many attributes of the device and the device hubs it is connected to.
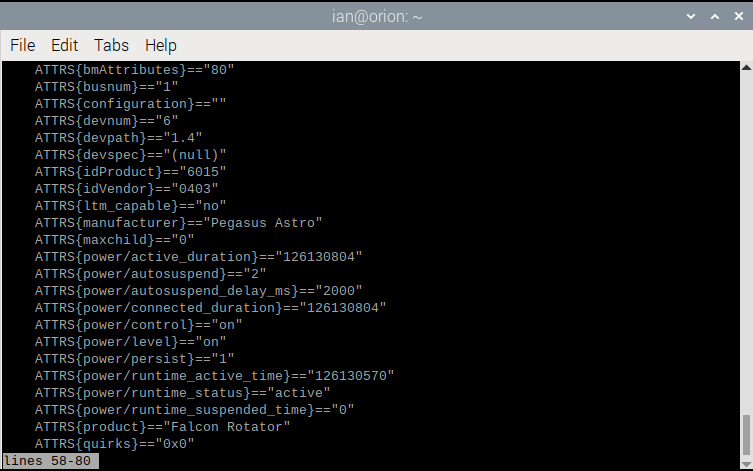
We are only interested in a few of these attributes, so we can extract these directly. Here are the commands and the attributes returned for a Pegasus Astro Falcon Rotator:
udevadm info --name=/dev/ttyUSB0 --attribute-walk | grep 'SUBSYSTEM' | head -n1
SUBSYSTEM=="tty"
udevadm info --name=/dev/ttyUSB0 --attribute-walk | grep 'ATTRS{idVendor}' | head -n1
ATTRS{idVendor}=="0403"
udevadm info --name=/dev/ttyUSB0 --attribute-walk | grep 'ATTRS{idProduct}' | head -n1
ATTRS{idProduct}=="6015"
These values will be used to create a rule specific to this device.
The subsystem, vendor and product identifiers are usually sufficient to create a rule but there may be occasions when there are multiple devices connected and using the same identifiers. You may have two FTDI cables, for very different devices, such as a GPS device and an EQMOD mount cable. To differentiate, we can add a third attribute to the rule, which in the case of FTDI cables could be the serial number:
udevadm info --name=/dev/ttyUSB0 --attribute-walk | grep 'ATTRS{serial}' | head -n1
ATTRS{serial}=="AC00MLSR"
Devices connected via Bluetooth are identified by their MAC address:
udevadm info --name=/dev/rfcomm0 --attribute-walk | grep 'ATTRS{address}' | head -n1
ATTRS{address}=="98:d3:31:fb:1c:d6"
Step 2: Create a Udev Rule
Now that you have the necessary information, you can create a custom udev rule. Udev rules are stored in /etc/udev/rules.d/. Create a new file in the udev rules directory:
sudo nano /etc/udev/rules.d/99-astrodevices.rules
In this file, add a line that defines the rule based on the attributes you found earlier. We will add our own symbolic link for the device, as we want to refer to it. For example, for the Pegasus Astro Falcon Rotator, it looks like this:
SUBSYSTEM=="tty", ATTRS{idVendor}=="0403", ATTRS{idProduct}=="6015", SYMLINK+="falcon_rotator"
This rule will create a symbolic link /dev/falcon_rotator whenever the device with the specified vendor ID, and product ID is connected.
Rules that rely on the serial number to uniquely identify devices may look like:
SUBSYSTEM=="tty", ATTRS{idVendor}=="0403", ATTRS{idProduct}=="6001", ATTRS{serial}=="AC00MLSR", SYMLINK+="lynx_astro_eqdir"
SUBSYSTEM=="tty", ATTRS{idVendor}=="0403", ATTRS{idProduct}=="6001", ATTRS{serial}=="PA4XVVGG", SYMLINK+="pegasus_eqdir_stick"
Rules that use a Bluetooth MAC address may look like:
SUBSYSTEM=="tty", ATTRS{address}=="98:d3:31:fb:1c:d6", SYMLINK+="my_focuser_pro_2"
SUBSYSTEM=="tty", ATTRS{address}=="98:b6:e9:1d:1f:93", SYMLINK+="game_controller"
Step 3: Reload Udev Rules
After saving the rule, reload the udev rules so the system can apply them:
sudo udevadm control --reload-rules
You can also trigger the rules manually to see if they’re working:
sudo udevadm trigger
Now, when you connect your astronomy device, it should always appear with the custom name you specified (e.g., /dev/telescope_mount or /dev/falcon_rotator).
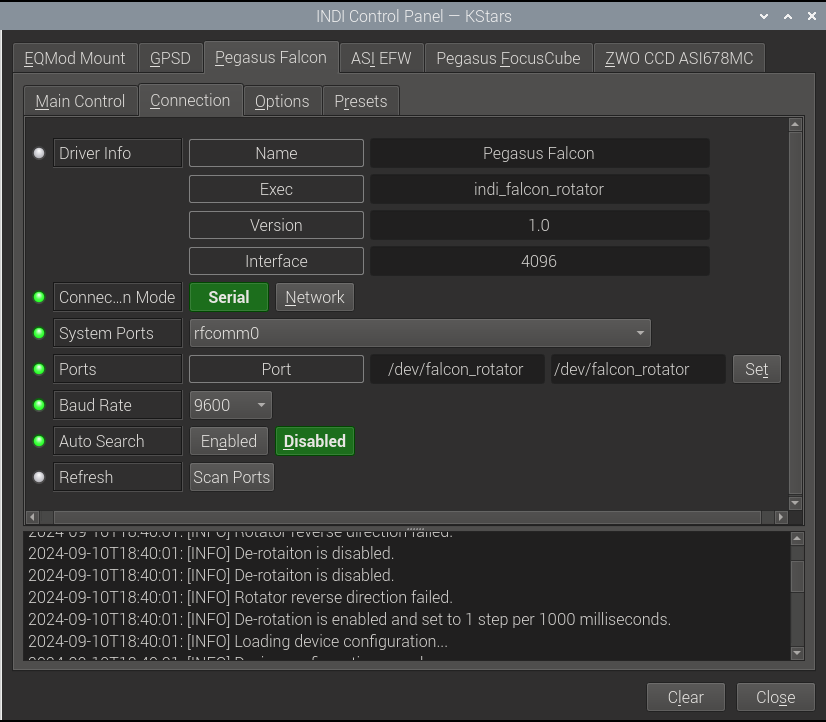
Step 4: Configure INDI to Use Udev Rules
The final step is to configure INDI to use the custom device names created by udev. Open your INDI control panel (such as in KStars or Ekos) and update the device paths to use your new symlinked device names.
For instance, if you’ve set up a telescope mount with the /dev/telescope_mount name, enter this in the INDI driver configuration for the mount.
This ensures that INDI always uses the correct device, regardless of the order in which devices are detected.
Benefits of Using Udev with INDI
- Consistency: Devices always appear with the same name, avoiding issues with randomly assigned USB ports.
- Automation: Once configured, your astronomy setup becomes plug-and-play. Devices are automatically recognized and assigned the correct drivers without manual intervention.
- Scalability: As your setup grows (e.g., adding more cameras or focusers), you can continue to add new udev rules, making the system easy to manage.
Conclusion
Using udev rules with INDI on a Raspberry Pi 5 ensures that your astronomy devices are consistently identified and properly configured every time you power up or connect them. This eliminates a lot of the frustration that can come with managing multiple devices in an astrophotography setup, making it easier to focus on capturing stunning images of the night sky.
With a little bit of initial setup, your Raspberry Pi-based system becomes more reliable and efficient, helping you make the most of your time under the stars. Happy stargazing!
Oh, I totally forgot about Udev.
Thanks for this addition to your blog.
Grtz Ed