Astrophotography is all about taking pictures of objects in space. It mixes technical skill with creativity. To get clear photos of the moon or distant galaxies, you need more than just a good telescope and camera. A key step is taking calibration frames. These frames help fix flaws in your photos. In this post, we’ll talk about why calibration frames matter and how they help you take amazing astrophotography pictures.
What are Calibration Frames?
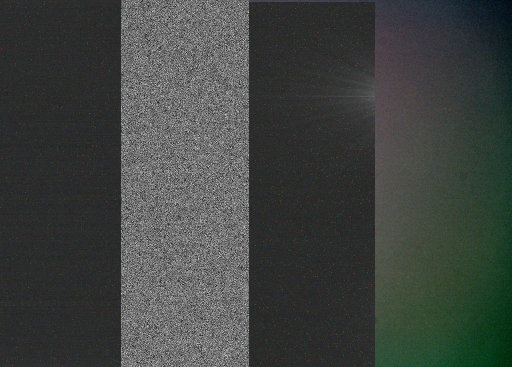
Calibration frames are essential images taken with your astrophotography setup to correct and improve your final photos. There are four main types of calibration frames: bias frames, dark frames, flat frames, and dark-flat frames. Each plays a specific role in the image processing workflow.
1. Bias Frames
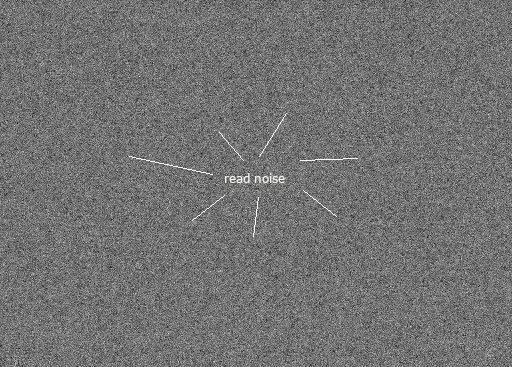
Bias frames are the shortest exposures your camera can take, with the lens or telescope cap on. They capture the camera’s read noise, which is the electronic noise created by the camera sensor itself. Subtracting bias frames from your light frames (the actual images of celestial objects) helps reduce this noise, leading to a cleaner final image.
2. Dark Frames
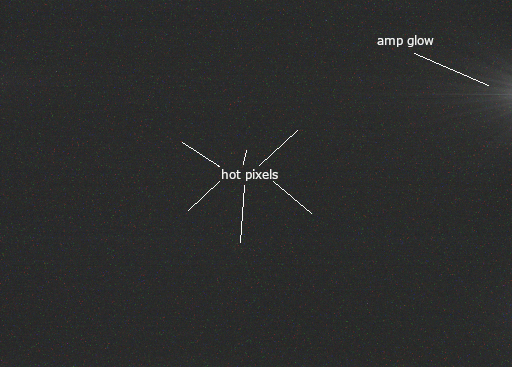
Dark frames are taken with the same exposure time, ISO, and temperature as your light frames, but with the lens or telescope cap on to prevent any light from entering. They capture thermal noise, often referred to as “hot pixels,” which are imperfections in the camera sensor that become more noticeable with longer exposures, and amplifier “amp” glow, caused by the electronic components within the camera’s sensor. By subtracting dark frames from your light frames, you can eliminate these hot pixels and amp glow, and reduce overall sensor noise.
3. Flat Frames
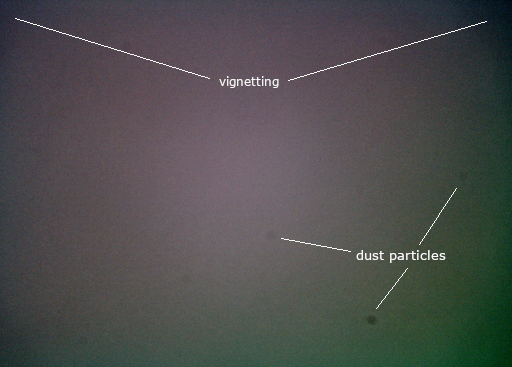
Flat frames are taken with a uniform light source, such as a white t-shirt stretched over the telescope lens or a dedicated flat field panel, to evenly illuminate the sensor. These frames capture vignetting (brightness fall-off towards the edges) and dust particles on the lens or sensor. Applying flat frames to your light frames corrects these optical imperfections, ensuring even illumination across your final image.
4. Dark-Flat Frames
Dark-flat frames are dark frames taken with the same settings as your flat frames. They help correct for thermal noise and other sensor artifacts present in the flat frames. By subtracting the master dark-flat frame from your flat frames, you can ensure that the flat frames are free of noise, leading to more accurate correction of the light frames.
Why Are Calibration Frames Important?
Improving Image Quality
Calibration frames are crucial for boosting the quality of your astrophotographs. They eliminate sensor noise, hot pixels, and optical flaws, allowing the true details of celestial objects to shine through. This results in a cleaner and more accurate depiction of what you’re photographing, revealing finer details and subtle structures that might otherwise be hidden.
Enhancing Signal-to-Noise Ratio (SNR)
In astrophotography, the signal is the actual light from celestial objects, while noise is the unwanted variation in the image. A high signal-to-noise ratio (SNR) is essential for producing clear and detailed images. Calibration frames help boost the SNR by reducing different types of noise, making the faint signals from distant stars and galaxies stand out more clearly.
Ensuring Consistency Across Images
Using calibration frames ensures consistency across your images, which is especially important when creating composite images or mosaics. Consistent calibration lets you combine multiple light frames seamlessly, resulting in a smooth and uniform final image. This consistency is key for producing high-quality astrophotography that is both scientifically accurate and visually appealing.
Saving Time in Post-Processing
Calibration frames can greatly reduce the time needed for post-processing. By correcting noise and optical imperfections during calibration, you’ll have less to fix later on. This streamlined workflow not only saves time but also improves the overall quality of your final images.
How to Take Calibration Frames
Bias Frames
- Cover the telescope or lens to prevent any light from entering.
- Set the camera to the shortest possible exposure time.
- Take at least 20-30 bias frames.
Dark Frames
- Cover the telescope or lens.
- Use the same exposure time, ISO, and temperature as your light frames.
- Take as many dark frames as light frames (usually 20-30).
Flat Frames
- Use a uniform light source to illuminate the sensor evenly.
- Ensure the camera settings match those used for your light frames.
- Take enough flat frames to average out any variations (typically 20-30).
Dark-Flat Frames
- Cover your telescope or camera lens to block all light.
- Use the same exposure time and camera settings as your flat frames.
- Capture multiple dark-flat frames (usually 10-20) and average them to create a master dark-flat frame.
Conclusion
In summary, calibration frames are crucial in astrophotography, laying the groundwork for clear, high-quality images. By learning to use bias, dark, and flat frames effectively, you can greatly improve the clarity, detail, and overall quality of your astrophotos. Whether you’re new to astrophotography or have years of experience, adding calibration frames to your process is key to capturing the stunning beauty of the night sky.