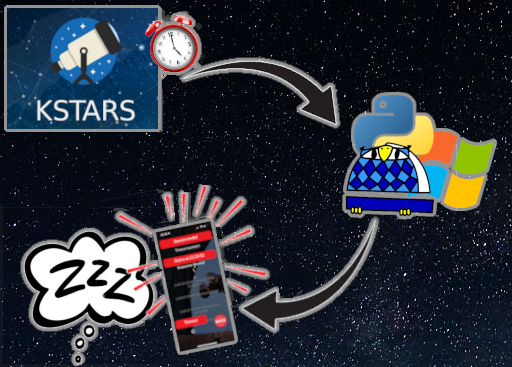
Lunatico’s Good Night System (GNS) actively alerts users when an automated imaging session fails, providing peace of mind—even when checked with a half-opened eye in the middle of the night. It seamlessly integrates with SGP, N.I.N.A., and other applications, but what about KStars/Ekos? While KStars includes a notification system, its functionality remains limited. To address this, I explored ways to integrate it with GNS. In this post, I’ll explain how I route KStars notifications to GNS.
How GNS Works
GNS has two parts. The server part sits on a system running Windows. When launched, it creates a System Tray process that other applications can communicate with to relay periodic status messages and alerts. Users can download the free Windows software from Lunatico‘s website. The client part runs on mobile devices through a paid app obtained from the Apple or Google stores. During a monitoring session, the mobile app connects to the GNS listener running on the Windows system and polls for updates.
When everything functions properly, the app remains green and quiet, displaying status messages as the imaging sequence progresses. If an issue arises, the app turns red and sounds an alarm. The system sets countdowns for time-sensitive events, and if an event fails to complete before the timer reaches zero, the alarm activates. This ensures users are alerted even if KStars or the computer crashes.
How KStars Notifications Work
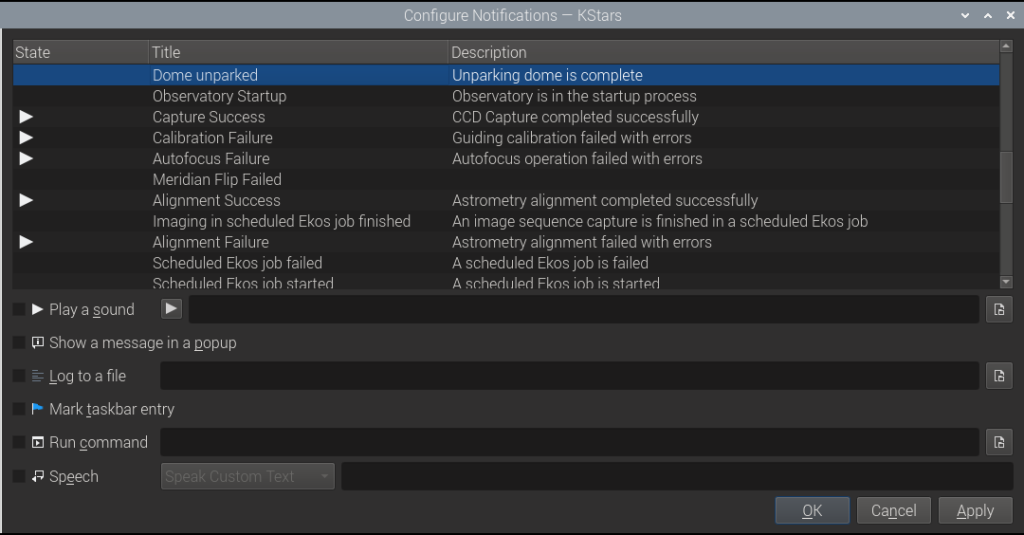
KStars generates notifications to report events encountered during operation. Each event supports up to six predefined actions triggered when detected. While some events play a basic sound by default, users can also configure them to display pop-up messages, write log entries, mark a taskbar entry, execute a command, use a speech engine to read text, or combine multiple actions. However, KStars currently lacks a plugin to integrate these notifications directly with GNS.
Test Scripts Delivered with GNS
Fortunately, the Windows installation of GNS includes a handful of Visual Basic scripts that are useful to test the GNS server and mobile app without needing to integrate with another application. These scripts are located in the GNS installation folder, typically C:\Program Files (x86)\GNS:
- alarm.vbs – Sends an alarm message, causing the mobile monitor to turn red and sound the alarm.
- idle.vbs – Sends an idle message, used when there is no activity requiring a timeout countdown.
- switchoff.vbs – Sends an end message, used when there is no further activity expected and the session has ended. No further messages are shown.
- message.vbs – Sends a message, without a timeout countdown.
- update.vbs – Sends a message, without a timeout countdown. This is the most useful script, as the timeout effectively controls the type of message sent:
- Greater than 0 – The timer counts down the number of seconds after the status message is sent. If the timer reaches 0 then something bad probably happened and an alarm is sounded.
- 0 – Something bad definitely happened and an alarm is sounded. This is what the alarm.vbs script sends.
- -1 – Idle, the status message is sent and the timeout countdown is disabled. This is what the idle.vbs script sends.
- -2 -Switch-off, the status message is sent and the timeout countdown is disabled, and no further updates are reported. This is what the switchoff.vbs script sends.
Using the Scripts
To use these scripts, first install and start the GNS application in Windows and check that the System Tray icon is there. Configure the GNS mobile app to connect to the GNS host and start the monitor. The Visual Basic scripts should be associated with the Microsoft Windows Based Script Host, so right-click the script and make sure this is selected as the Open With/Run As.. option. Run the script by double clicking it or from the command line. The update.vbs and message.vbs should be run from the command line as they take parameters – the message for the message script, and the the message and timeout value for the update:
C:\> cd C:\Program Files (x86)\GNS
C:\Program Files (x86)\GNS> alarm.vbs
C:\Program Files (x86)\GNS> idle.vbs
C:\Program Files (x86)\GNS> switchoff.vbs
C:\Program Files (x86)\GNS> message.vbs "Message text"
C:\Program Files (x86)\GNS> update.vbs "Message text" 120
The Solution
I created a lightweight Python web server, configured in just a few lines of code, that accepts requests from remote hosts, and routes those requests to the GNS scripts. This way, I could use the command action for the KStars event handler to make a web request to my web server, adding a message and timeout value suited to the event directly in the URL.
Step 1: Install Python
The Python download page provides the latest version for Windows, currently 3.12.5. Once downloaded, run through the installation process. To verify, open a Windows command line and check the version:
python --version
Python 3.12.5
Step 2: Install Flask Libraries
The lightweight Python web server is provided by Flask, so we need to install the Flask package using the Python installer:
pip install -U Flask
Step 3: Create the Web Server Script
Create the Flask web server script in the same folder where the GNS Visual Basic scripts are located, typically C:\Program Files (x86)\GNS:
<pre class="wp-block-syntaxhighlighter-code">from flask import Flask
import subprocess
app = Flask(__name__)

@app.route("/update/<string:text>/<string:timeout>")
def update(text, timeout):
    subprocess.run(['cscript', 'update.vbs', text, timeout])
    return "<h1>" + text + "</h1>"

@app.route("/alarm/<string:text>")
def alarm(text):
    subprocess.run(['cscript', 'update.vbs', text, '0'])
    return "<h1>" + text + "</h1>"

@app.route("/idle/<string:text>")
def idle(text):
    subprocess.run(['cscript', 'update.vbs', text, '-1'])
    return "<h1>" + text + "</h1>"

@app.route("/switchoff/<string:text>")
def switchoff(text):
    subprocess.run(['cscript', 'update.vbs', text, '-2'])
    return "<h1>" + text + "</h1>"</pre>
Name the script gns_for_kstars.py. You can choose any name you like, just don’t call it flask.py as that will cause problems!
Step 4: Start the Web Server
The Flask web server is started from the command line:
python -m flask --app gns_for_kstars run --host=0.0.0.0
We want the web server to service requests from anywhere on the network, so we bind the service to the 0.0.0.0 address. The service uses port 5000 by default. If you are conscious about security and want to restrict the service address, or change the port number, then refer to the Flask documentation.
 * Serving Flask app 'gns_for_kstars'
 * Debug mode: off
WARNING: This is a development server. Do not use it in a production deployment. Use a production WSGI server instead.
 * Running on all addresses (0.0.0.0)
 * Running on http://127.0.0.1:5000
 * Running on http://192.168.178.67:5000
Press CTRL+C to quit
Step 5: Test the Web Server Alerts
With the GNS application started on the Windows system, the Flask web server running, and the GNS mobile app open and monitoring, it is time to test. Before starting, you should note that the message string should meet the encoding requirements for a URL, which means that characters like spaces, slashes, ampersands, and question marks should be replaced with their URL safe equivalents:
- %20 – Space
- %2F – Forward slash
- %26 – Ampersand
- %3F – Question mark
W3Schools provide a handy tool to encode any string into a URL safe string.
Open a web browser on the system where GNS is running and enter the complete URL for an idle event.
http://127.0.0.1:5000/idle/Test%20Idle%20Message
You should see the request handled by the web server, and a HTTP 200 status code returned:
127.0.0.1 - - [04/Sep/2024 16:00:04] "GET /idle/Test%20Idle%20Message HTTP/1.1" 200 -
The GNS mobile app reports the status and enters a paused state:

Now try with a message that has a timeout of 120 seconds.
http://127.0.0.1:5000/update/Test%20Timeout%20Message/120
You should again see the request handled by the web server, and a HTTP 200 status code returned:
127.0.0.1 - - [04/Sep/2024 16:00:04] "GET /idle/Test%20Idle%20Message HTTP/1.1" 200 -
The GNS mobile app reports the status and starts a count down from 120 seconds. When it enters the last 30 seconds it turns amber, and when it gets to zero the alarm is sounded:


Repeat the test for the alarm and switch-off events:
http://127.0.0.1:5000/alarm/Test%20Alarm%20Message
http://127.0.0.1:5000/switchoff/Test%20Switchoff%20Message
The requests are handled, and HTTP 200 status codes returned:
127.0.0.1 - - [04/Sep/2024 16:00:04] "GET /alarm/Test%20Alarm%20Message HTTP/1.1" 200 -
127.0.0.1 - - [04/Sep/2024 16:03:12] "GET /switchoff/Test%20Switchoff%20Message HTTP/1.1" 200 -
The GNS mobile app reports the alarm and switch-off:


Step 6: Configure KStars Notifications
Once all the tests work out, the next step is to make the web requests using command calls from the KStars notifications themselves.
Open KStars then go to Settings->Configure Notifications...:
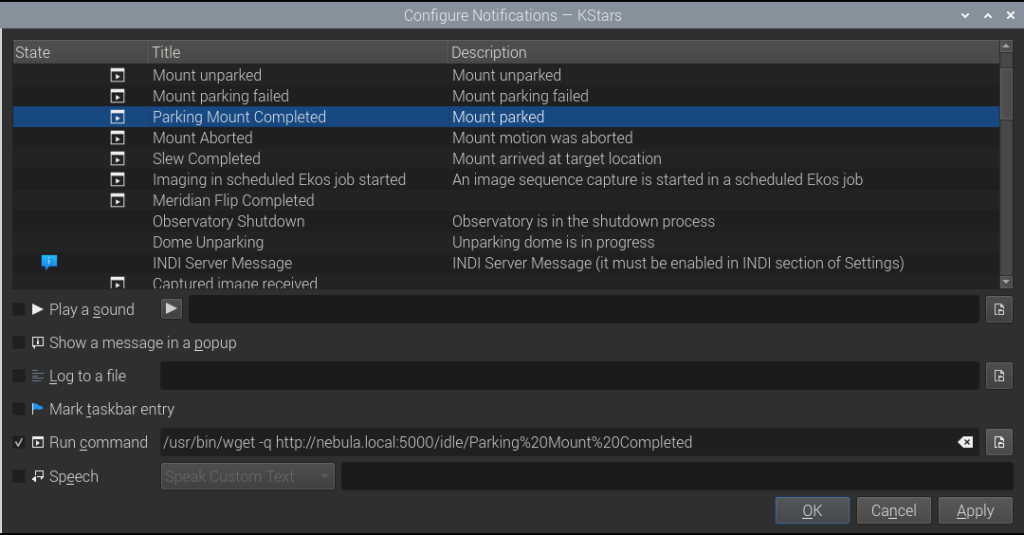
Select an event you expect to come across in your sequence, then check the Run command box. Enter the fully qualified command to make a web request, for which we use /usr/bin/wget. For example, select the Parking Mount Completed event, then use the idle request since this event results in an idle state:
/usr/bin/wget -q http://nebula.local:5000/idle/Parking%20Mount%20Completed
If you are running KStars on a different system then you must change the URL to reach the system on which the web server and GNS are running on.
Repeat the setup for other events, and consider how you want the event handled. For example, a slew or meridian flip event should take no more that a minute to complete, so set a countdown timer for 60 seconds:
/usr/bin/wget -q http://nebula.local:5000/update/Slew%20Started/60
/usr/bin/wget -q http://nebula.local:5000/update/Meridian%20Flip%20Started/60
Countdown events should be followed by another event before the timer expires, otherwise the alarm will sound:
/usr/bin/wget -q http://nebula.local:5000/idle/Meridian%20%Flip%Completed
Set some alarm events, but remember that these will sound the alarm as soon as the event is triggered, so make sure it is something important:
/usr/bin/wget -q http://nebula.local:5000/alarm/Guiding%20Failure
/usr/bin/wget -q http://nebula.local:5000/alarm/Weather%20Alert
/usr/bin/wget -q http://nebula.local:5000/alarm/Meridian%20Flip%Failed
Take care with the switch-off events, as these will end the GNS monitoring session, and subsequent alarms will not get reported. Only use these events at the very end of the sequence, if at all!
Step 7: Enjoy Peace of Mind With Your Automated Sequence
Once all anticipated events are configured, you can relax in the knowledge that GNS will keep you updated as your sequence progresses, and only disturb you when something needs your attention.
Clear skies, and sweet dreams!