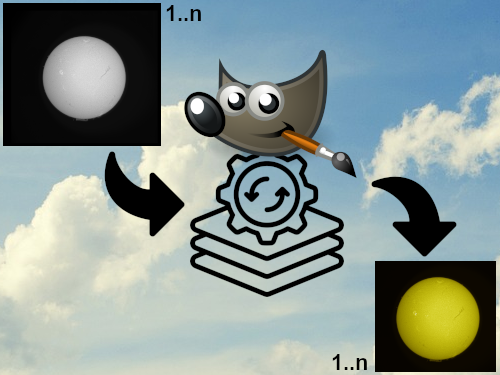
In this guide, we’ll explore how to batch process astrophotography images using the BIMP (Batch Image Manipulation Plugin) for GIMP (GNU Image Manipulation Program). This is especially useful for preparing batches of individual images for use in timelapse videos.
BIMP is a powerful tool that enables you to automate repetitive tasks and apply edits to multiple images simultaneously. This makes it an invaluable asset for astrophotographers looking to enhance their workflow. It is especially useful for processing batches of individual images for use in a timelapse video.
Image Data Used for this Guide
This guide captured image data during beta testing of the exciting new planetary, lunar, and solar guiding features of PHD2. The sun was shining, so I grabbed my Lunt LS40THa/B600 H-alpha solar telescope and ZWO ASI432MM monochrome camera. I recorded over 6 hours of solar full disc with 30 second SER videos shot every minute, resulting in 434 videos, stacked with Autostakkert, and enhanced with ImPPG. Transparency was far from ideal, so the images produced weren’t as good as they could be. However, they were still viable enough for this guide.
The batch processing of these 434 images will consist of:
- Cropping.
- Converting to RGB.
- Colorizing the RGB channels.
Planning the Crop
We start by analysing a single frame, aligning it using ImPPG, with our target pretty much central.
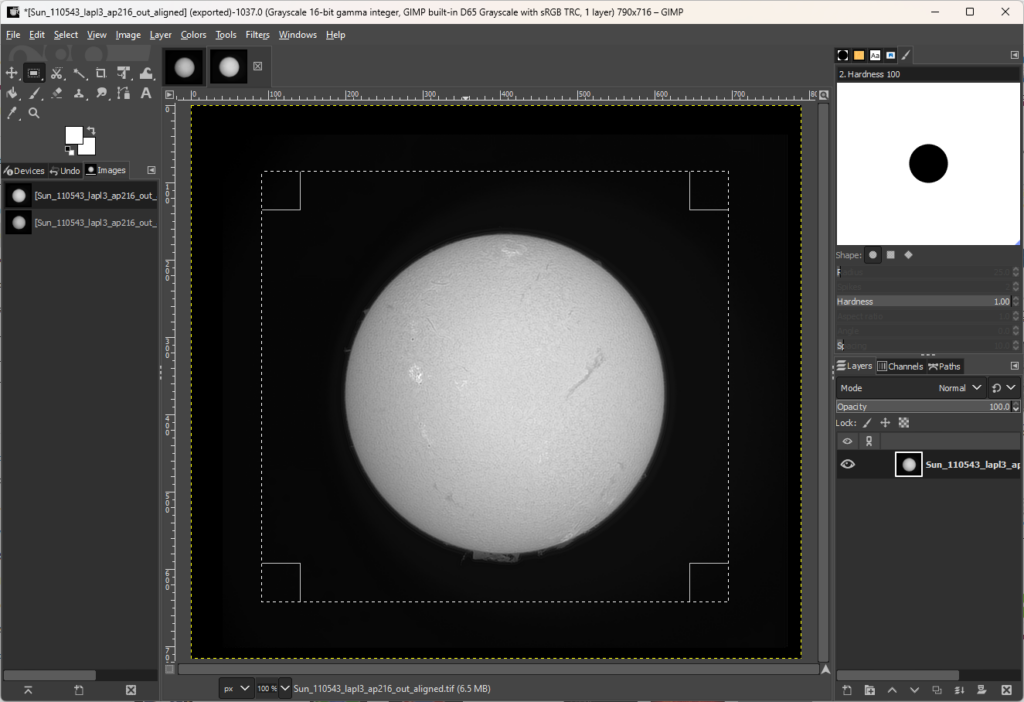
Use the Rectangle Select Tool to plan the area to crop. We want to crop the image to a 600 pixel square, 300 pixels in all directions from the centre.
Planning the Colour
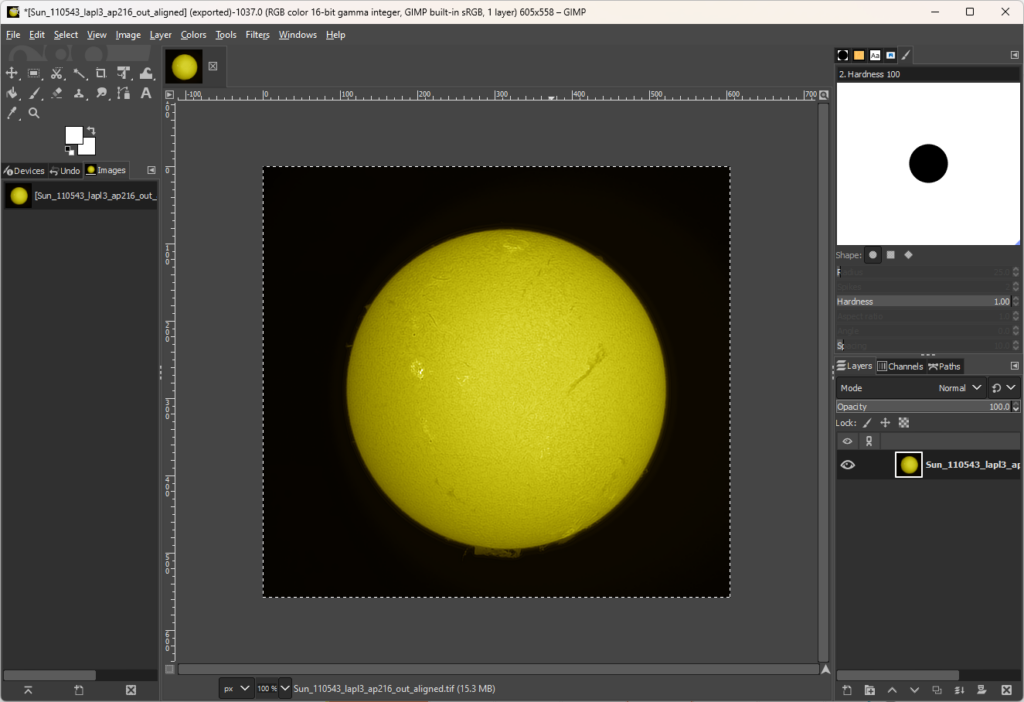
We first convert our image from monochrome to RGB using Image -> Mode -> RGB. We then adjust the colour gamma levels for each of the Red, Blue, and Green Channels using Colors -> Levels. This involves selecting each Channel in turn. As always with astrophotography, artistic license determines the desired colour tones. Therefore, we will go for a traditional yellow/orange for the Sun. As a general rule, the gamma settings are decimal percentages of the RGB colour code, with 255 as 1.0. e.g.:

| Hex: | #FFDE1A |
| RGB: | 255, 222, 26 |
| Gamma: | 1.00, 0.87, 0.10 |
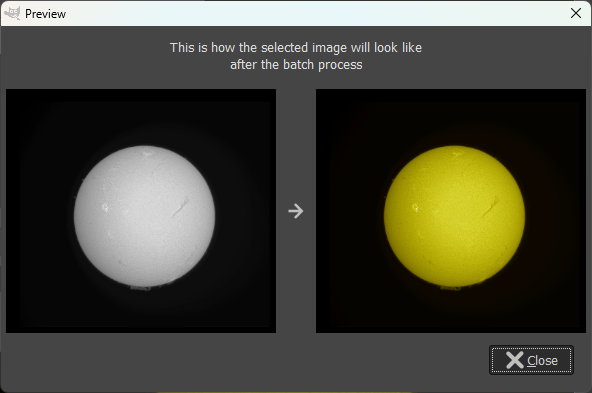
With these gamma settings applied, our image takes on colour:
Creating the Batch Manipulation Set
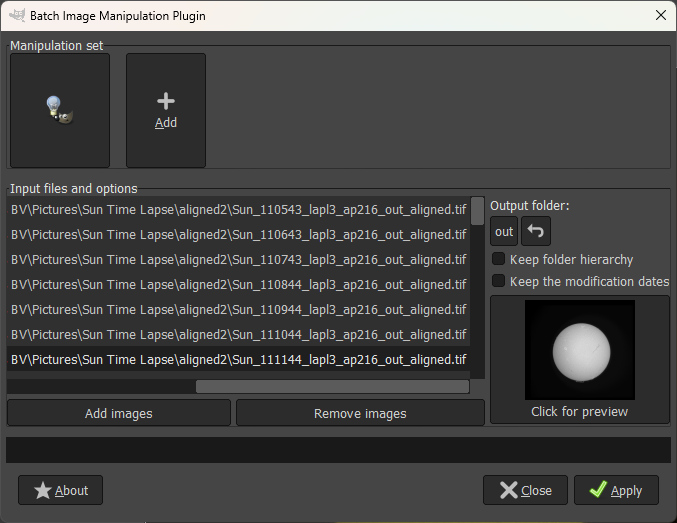
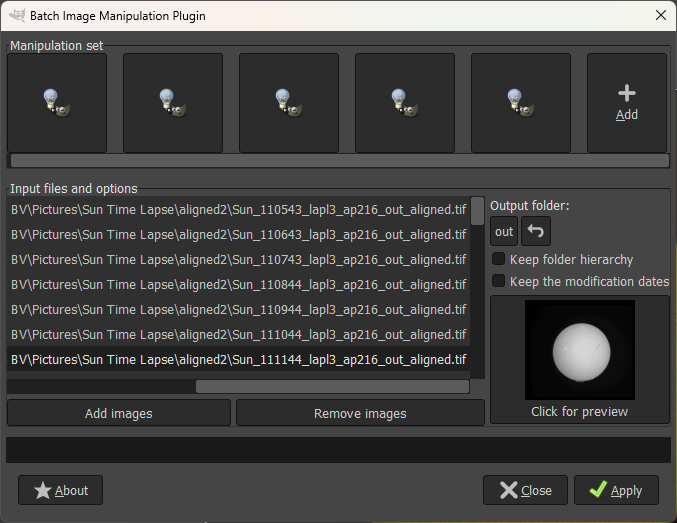
Once we’ve decided on our crop and colour settings, we create a BIMP manipulation set to apply the settings to our batch of images. Open the File -> Batch Image Manipulation menu then use the Add Images button to select the images to be processed. The images used for this demo are in a single folder, so we select Add Folders… and navigate to our folder:
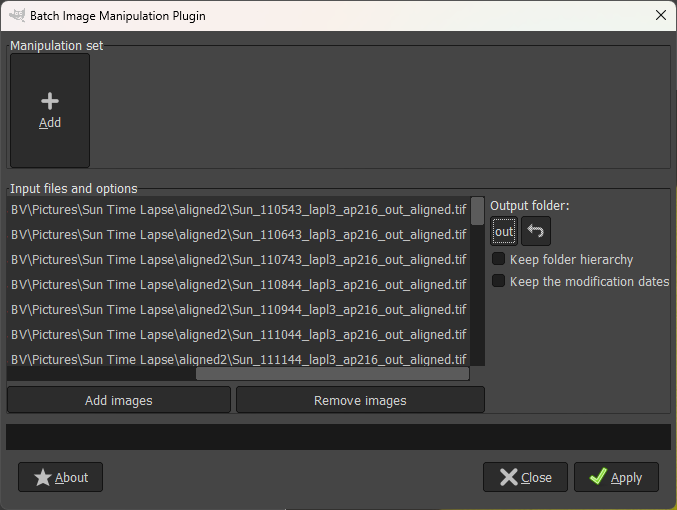
Click the output folder to select the folder where you will place the processed images.
With our images selected, we add our first procedure using the Add + button. The most common procedures are immediately available, including Crop, but we won’t use this as we need access to advanced options. Instead, we get to the desired crop procedure through the Other GIMP procedure…. option. Then, search for crop and select gimp-image-crop.
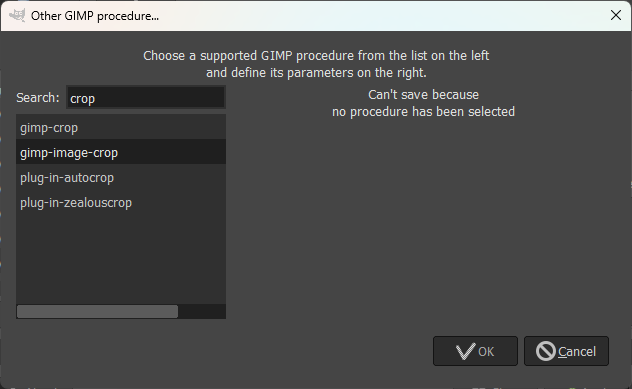
The centre of our image target is at X: 405, Y: 400. We want an image height and width of 600 pixels, so we punch in those values then hit OK:

This adds our first procedure to the Manipulation Set:
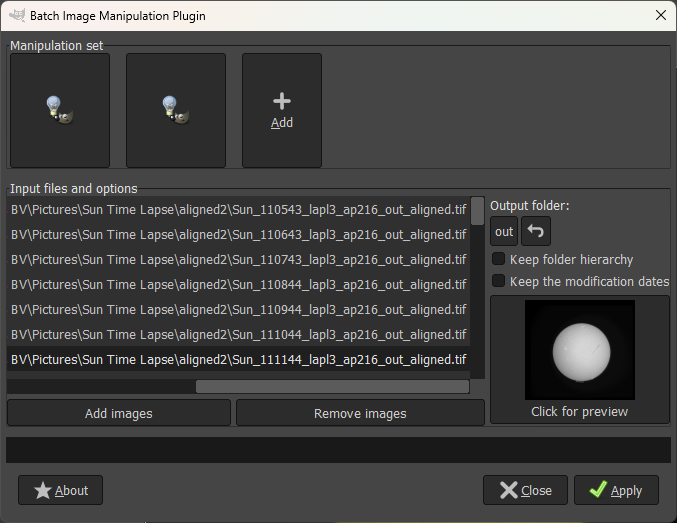
Next, we add the image conversion from monochrome to RGB. Click the Add + button again, then Other GIMP procedure…. , search for rgb and select gimp-image-convert-rgb:

There are no additional options here, so just hit OK. This adds our second procedure to the Manipulation Set:
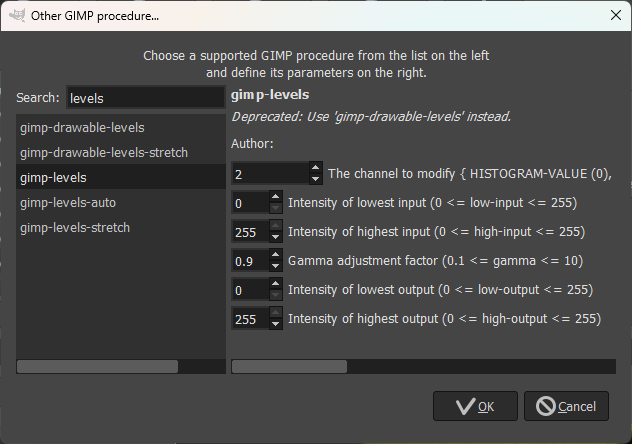
Now we can start adding our RGB colour adjustments. Click the Add + button again, then Other GIMP procedure…. , search for levels and select gimp-levels. The RGB channels use histogram values 1 for red, 2 for green, and 3 for blue. So, we first add our values for red, with gamma set to 1.0. We also want to apply our values over 100% of the intensity range for both input and output, which are represented as values 0 to 255:
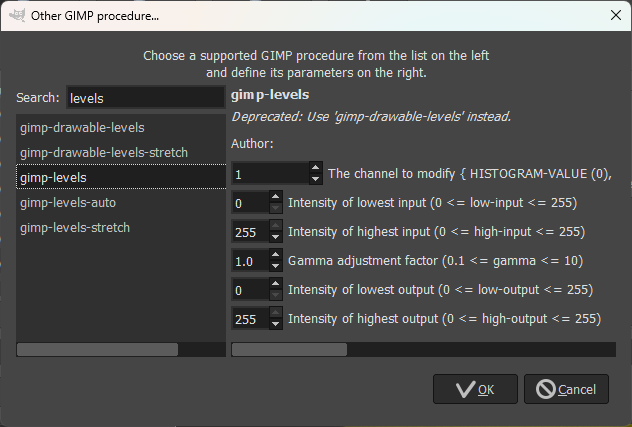
Hit OK to set the values for our Red channel, then repeat adding the procedure for the Green, then Blue levels. Note, the regular GIMP UI supports values to 2 decimal places, but the BIMP procedure supports only 1 decimal place. So, the value is rounded on input. For Green:
Then Blue:

With our procedures to crop, convert to RGB, and set levels for each of the RGB channels, we now have 5 procedures in our Manipulation Set:
Click the image icon to preview the resulting image we will get once the procedures are applied:
Executing the Batch Process
Once you’ve added all the desired procedures to the batch process, it’s time to execute it. Click the Apply button and watch as GIMP applies the specified edits to each image in the queue. Depending on the number of images and the complexity of the edits, this process may take some time. So, be patient.
Reviewing and Fine-Tuning
Once the batch process is complete, take some time to review the edited images. Pay attention to the overall quality, color balance, and any artifacts that may have been introduced during processing. If necessary, you can fine-tune individual images manually using GIMP’s editing tools. Or, add additional manipulation procedures to the batch process.
Conclusion
Batch processing astrophotography images using the BIMP plugin for GIMP is a highly effective way to streamline your workflow and achieve consistent results. By organizing your images, configuring BIMP, creating a batch process, and reviewing the results, you can enhance your astrophotography workflow. This allows you to spend more time capturing the wonders of the cosmos.
So, next time you embark on a stargazing adventure and capture a series of breathtaking images, remember the power of batch processing with BIMP. It’s a tool that can help you turn raw captures into stunning masterpieces with ease. Happy photographing!