Aaron W. Morris created INDI-AllSky as an open-source software solution for all-sky cameras, which capture wide-angle images of the entire sky. The software fully supports the Raspberry Pi 5 and works with various cameras and lenses, including the Raspberry HQ camera and affordable wide-angle CCTV lenses. Amateur astronomers, astrophotographers, and scientific observatories commonly use it to monitor and record sky conditions, meteors, auroras, celestial events, and more. Here are some specific applications:
Key Features of INDI-AllSky
- Night Sky Observation:
- Capture stunning wide-field images of the night sky, including stars, planets, the Milky Way, and other celestial phenomena.
- Meteor Detection:
- Monitor and record meteors, fireballs, and meteor showers. INDI-AllSky can help identify and track these events automatically.
- Star Trails
- Create star trail images that stack the stars from each frame to show their progression across the sky.
- Aurora Monitoring:
- Capture auroras (northern or southern lights) in real-time. It’s particularly useful for people in high-latitude regions.
- Cloud Monitoring and Weather Observation:
- Track cloud cover and other atmospheric conditions to determine whether the sky is clear enough for astronomical observations.
- Light Pollution Studies:
- Document and analyze light pollution levels in a specific area over time.
- Smoke reporting
- Report the level of smoke coverage in your location.
- Timelapse Creation:
- Generate timelapse videos of the night sky, showcasing the motion of stars, planets, and satellites. Create visual representations of entire timelapse video in a single frame Keogram.
- Real-Time Sky Condition Monitoring:
- Provide real-time sky condition updates, which is useful for coordinating observations or telescope sessions.
- Outreach and Education:
- Share live or recorded views of the sky with the public to inspire interest in astronomy and science.
Why Use INDI-AllSky?
- Integration with INDI Protocol: INDI-AllSky integrates with the INDI protocol, a system used for controlling astronomical devices. This makes it compatible with a wide range of cameras and equipment.
- Automation: Automates image capture, processing, and upload, allowing for unattended operation.
- Single Board Computer Support: Works great with the Raspberry Pi 5!
- Extensive Camera Support: Supports a wide range of cameras from many manufacturers.
- Customization: Offers a high degree of configurability for different use cases, including exposure settings, image processing, and detection algorithms.
- Community Support: A community of users shares tips, setups, and results, making it easier to get started and improve your all-sky imaging.
In this blog post, we will guide you through the process of setting up INDI-AllSky on a Raspberry Pi 5 with a Raspberry Pi HQ Camera, step by step.
This article describes a procedure to install software on a Raspberry Pi 5 with 8G RAM running Raspberry Pi OS (64-bit) (Debian v.12 bookworm) booted directly from a 1TB NVMe SSD PCIe drive. This procedure may work for other configurations, so please do let us know if it does, or tell us about any issues you faced and your configuration. Thanks!
Prerequisites
- Raspberry Pi 5 board with Raspberry Pi OS (or any other compatible operating system) installed and configured.
- Raspberry Pi High Quality Camera, with its 12.3 megapixel Sony IMX477 sensor, 7.9mm diagonal image size, and back-illuminated sensor architecture, with adjustable back focus., making it an ideal camera for use in AllSky projects.
- For the best possible performance, check out how to Turbocharge Your Raspberry Pi 5: Booting from NVMe SSD.
- Stable internet connection for downloading software packages.
- Basic familiarity with the Raspberry Pi environment, including how to open a terminal and run commands.
Step 1: Prepare Your Raspberry Pi 5
Begin by ensuring that your Raspberry Pi 5 is up to date. Open a terminal or SSH session and run the following commands:
sudo apt update && sudo apt upgrade
This will update the package lists and upgrade any installed packages to their latest versions.
Step 2: Install INDI from Source
INDI-AllSky requires INDI. Follow our guide Installing INDI on a Raspberry Pi 5 to make sure you have the latest version available.
Step 3: Install Required Dependencies
Some of these packages are already installed, but there is no harm in mentioning them all here, just in case:
sudo apt install git python3 python3-pip libopencv-dev python3-opencv ffmpeg
Step 4: Connect and Verify Pi HQ Camera
Connect your Pi HQ camera, or whichever camera you choose, using the CSI/DSI connector. Note that the Raspberry Pi 5 connection port is smaller than for earlier Pi models, so an adaptor cable may be needed. The Raspberry Pi 5 should automatically recognise the camera, without the need to enable anything in the system configuration.
With the camera connected, enter the following command:
libcamera-hello --list-cameras
This should respond with the camera’s details:
Available cameras
-----------------
0 : imx477 [4056x3040 12-bit RGGB] (/base/axi/pcie@120000/rp1/i2c@80000/imx477@1a)
    Modes: 'SRGGB10_CSI2P' : 1332x990 [120.05 fps - (696, 528)/2664x1980 crop]
           'SRGGB12_CSI2P' : 2028x1080 [50.03 fps - (0, 440)/4056x2160 crop]
                             2028x1520 [40.01 fps - (0, 0)/4056x3040 crop]
                             4056x3040 [10.00 fps - (0, 0)/4056x3040 crop]
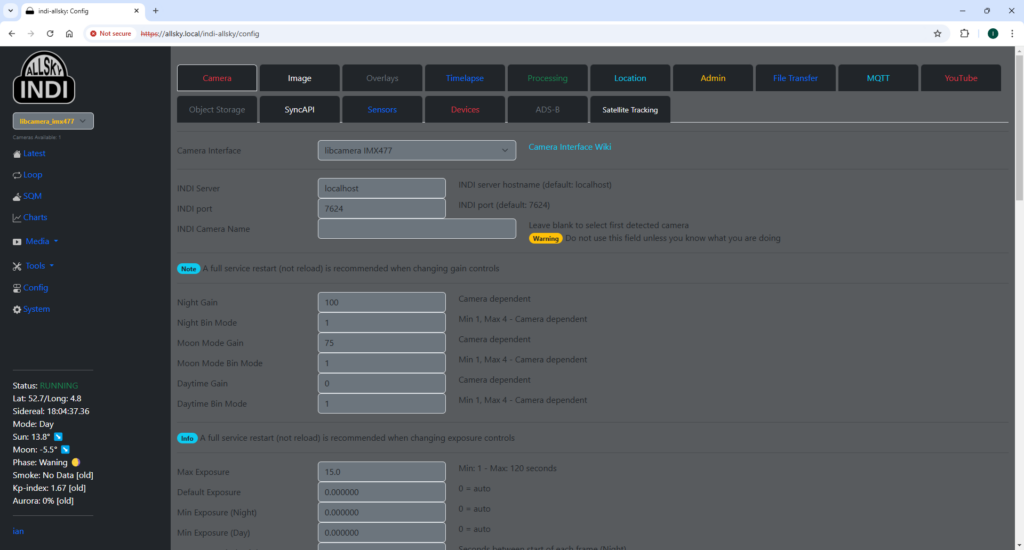
These details are needed for configuring INDI-AllSky.
Step 5: Download and Install INDI-AllSky
Create a project directory into which the source will be downloaded:
mkdir ~/Projects
cd ~/Projects
The latest version of INDI-AllSky is cloned and installed from the official Github repository:
git clone https://github.com/aaronwmorris/indi-allsky.git
Step 6: Install INDI-AllSky
Run the installation script:
cd ~/Projects/indi-allsky
./setup.sh
The first prompt is for the camera interface type. The Pi HQ camera uses libcamera, so select option 2:
1) indi
2) libcamera
3) pycurl_camera
4) indi_accumulator
5) indi_passive
Select a camera interface: 2
The second prompt is for the libcamera interface type. The Pi HQ camera uses the imx477 library as seen above in the camera details, so select option 1:
1) libcamera_imx477	      7) libcamera_imx462	  13) libcamera_imx290
2) libcamera_imx378	      8) libcamera_imx327	  14) libcamera_imx298
3) libcamera_imx708	      9) libcamera_imx678	  15) libcamera_64mp_hawkeye
4) libcamera_imx519	     10) libcamera_ov5647	  16) libcamera_64mp_owlsight
5) libcamera_imx500_ai	     11) libcamera_imx219
6) libcamera_imx283	     12) libcamera_imx296_gs
Select a libcamera interface: 1
The setup then installs the required packages, which will take a minute or two.
Next, the Option Python Modules prompt is shown. I prefer to install all modules, so select Yes:

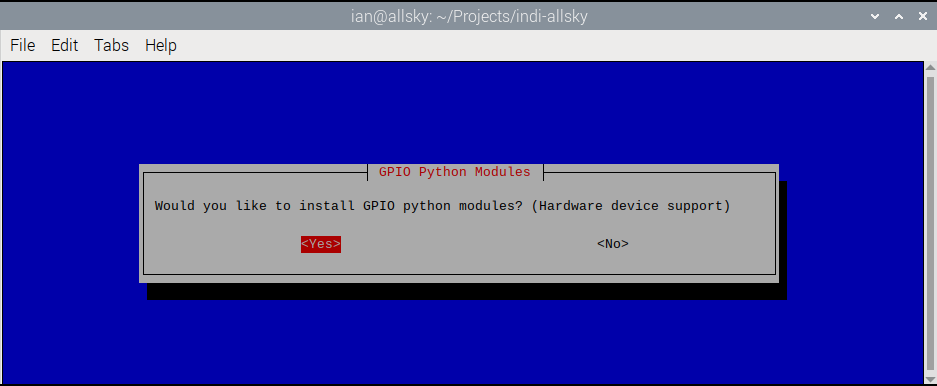
The GPIO Python Modules prompt is show. I prefer to install these in case I want to add a stepper motor focuser driven from the GPIO pins:

The system downloads and installs the optional packages, which takes a few more minutes.
The next prompt is for the GPS Driver. At this moment I had none installed, but I will add GPSD later. We have a guide for Adding INDI GPS support.

The next prompt is for Web Authentication. If you are hosting INDI-AllSky on your home network then the likelihood is that you will not need authentication for all web site views, but if you are planning for your INDI-AllSky to be accessible directly from the internet then you should reconsider:

You enter the latitude and longitude manually if you didn’t select a GPS driver above; otherwise, the device automatically populates them.

Next comes the TimeZone data configuration. I am in Europe:

Amsterdam is closest:

The setup the configures the Apache webserver that will present the website. Once complete, the logon username and password are prompted:

Complete the remaining prompts for full name and email address.
Finally, we want to restart the indiserver, and we want to start INDI-AllSky automatically at boot, and start it now:


And that’s it! You can now navigate to your INDI-AllSky web address:
https://allsky.local/indi-allsky

Further Reading
The author of INDI-AllSky provides a comprehensive wiki page with complete guides for all aspects of INDI-AllSky, so make sure to visit before delving too deep.
Conclusion
Congratulations! You’ve successfully set up INDI-AllSky on your Raspberry Pi 5 with the Raspberry Pi HQ Camera. Happy stargazing!
