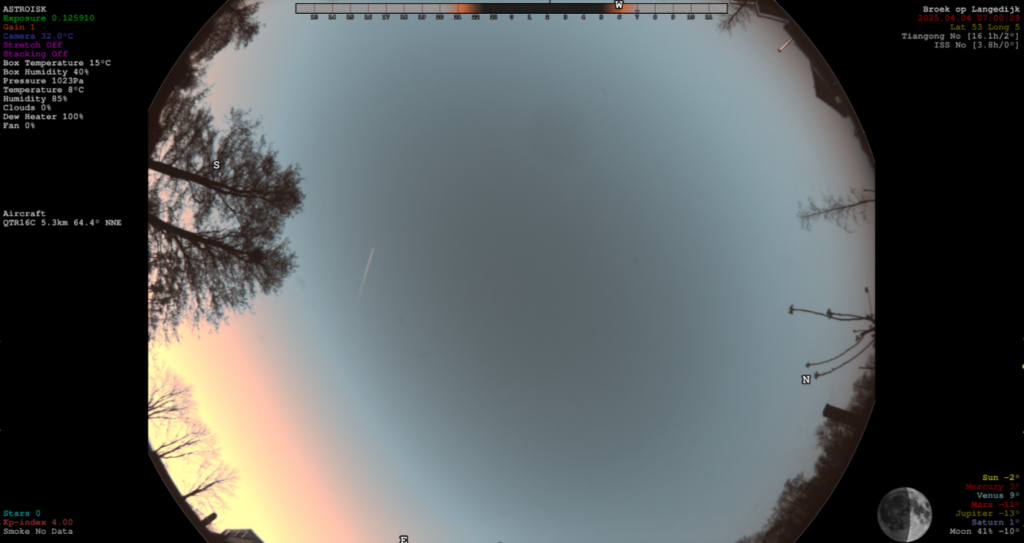
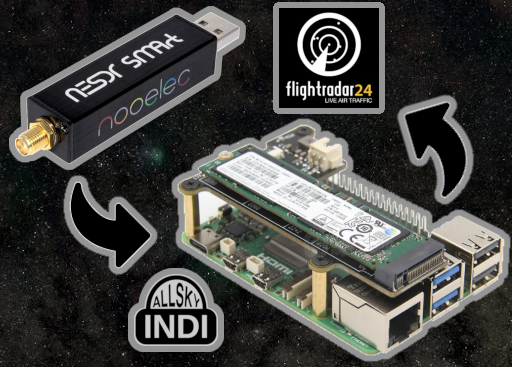
Tracking aircraft flying above your AllSky installation can help determine if the streak across your image is a spectacular meteor or the KLM 777 red-eye to New York. INDI-AllSky already offers excellent support for tracking and reporting aircraft by adding an inexpensive ADS-B (Automatic Dependent Surveillance–Broadcast) SDR (Software Defined Radio) receiver such as the Realtek RTL2832U, which fully supports the Raspberry Pi 5.
About Flightradar24
FlightRadar24 is a popular online flight tracking service that provides real-time information about aircraft worldwide. It collects data from ADS-B receivers, MLAT (Multilateration), and radar sources to display aircraft locations, routes, altitudes, and speeds. Users can contribute to the Flightradar24 network, to help expand coverage and in doing so receive a free business subscription worth EUR 500 a year.
If you already have an ADS-B receiver for your AllSky setup, then why not contribute to the Flightradar24 network and receive a great benefit. Tracking aircraft in real-time is easy with FlightRadar24 and a Raspberry Pi 5.
This article describes a procedure to install software on a Raspberry Pi 5 with 8G RAM running Raspberry Pi OS (64-bit) (Debian v.12 bookworm) booted directly from a 1TB NVMe SSD PCIe drive. This procedure may work for other configurations, so please do let us know if it does, or tell us about any issues you faced and your configuration. Thanks!
Prerequisites
- Raspberry Pi 5 board with Raspberry Pi OS (or any other compatible operating system) installed and configured.
- For the best possible performance, check out how to Turbocharge Your Raspberry Pi 5: Booting from NVMe SSD.
- Stable internet connection for downloading software packages.
- Basic familiarity with the Raspberry Pi environment, including how to open a terminal and run commands.
- A software defined radio (SDR) device such as the RTL-SDR RTL2832U USB dongle and an antenna.
- A free Flightradar24 account.
Step 1: Prepare the Raspberry Pi 5
Ensure your Raspberry Pi 5 has the latest packages. Update the system by running:
sudo apt update && sudo apt upgrade
Connect your Raspberry Pi 5 to the internet via Wi-Fi or Ethernet.
Step 2: Install Flightradar24
Download and install the Flightradar24 feeder software by executing:
wget -qO- https://fr24.com/install.sh | sudo bash -s
Flightradar24 requires the Dump1090-mutability package, and will install it if necessary. The installer downloads the required packages. After a while a prompt appears:
______  _  _         _      _                    _              _____    ___
|  ___|| |(_)       | |    | |                  | |            / __  \  /   |
| |_   | | _   __ _ | |__  | |_  _ __  __ _   __| |  __ _  _ __`' / /' / /| |
|  _|  | || | / _` || '_ \ | __|| '__|/ _` | / _` | / _` || '__| / /  / /_| |
| |    | || || (_| || | | || |_ | |  | (_| || (_| || (_| || |  ./ /___\___  |
\_|    |_||_| \__, ||_| |_| \__||_|   \__,_| \__,_| \__,_||_|  \_____/    |_/
               __/ |
              |___/
[main][i]FR24 Feeder/Decoder
[main][i]Version: 1.0.48-0/generic
[main][i]Built on Apr 10 2024 08:37:23 (T202404100820/Linux/static_arm64)
[main][i]Running on: debian="12"
[main][i]Local IP(s): 192.168.178.214,192.168.178.202,2001:1c04:4209:3700:4564:cc70:896f:f83b,fe80::12f5:77a6:8e88:4f2d,2001:1c04:4209:3700:d6f6:17af:d183:a6c5,fe80::8f6e:fcc0:e400:709b
[main][i]Copyright 2012-2024 Flightradar24 AB
[main][i]https://www.flightradar24.com
[main][i]DNS mode: PING

Welcome to the FR24 Decoder/Feeder sign up wizard!

Before you continue please make sure that:

 1 - Your ADS-B receiver is connected to this computer or is accessible over network
 2 - You know your antenna's latitude/longitude up to 4 decimal points and the altitude in feet
 3 - You have a working email address that will be used to contact you
 4 - fr24feed service is stopped. If not, please run: sudo systemctl stop fr24feed

To terminate - press Ctrl+C at any point


Step 1.1 - Enter your email address (username@domain.tld)
Follow the prompts to complete the setup. Use the email address used to create the free Flightradar24 account. Provide your antenna’s latitude, longitude, and altitude and confirm your closest airport. Finish your account registration by confirming the settings.
The next step asks for your SDR device type. In most cases, users connect a DVB-T dongle to the USB port of the Raspberry Pi 5.
Step 4.1 - Receiver selection (in order to run MLAT please use DVB-T stick with dump1090 utility bundled with fr24feed):

 1 - DVBT Stick (USB)
 -----------------------------------------------------
 2 - SBS1/SBS1er (USB/Network)
 3 - SBS3 (USB/Network)
 4 - ModeS Beast (USB/Network)
 5 - AVR Compatible (DVBT over network, etc)
 6 - microADSB (USB/Network)

Enter your receiver type (1-6)$: 1
Follow the remaining prompts. The defaults should be fine is most cases. Once you complete it, you submit the form and the system assigns your personal sharing key. You will receive an email confirming the sharing key and your personal radar station id.
Thank you for supporting Flightradar24! We hope that you will enjoy our Premium services that will be available to you when you become an active feeder.

To start sending data now please start the fr24feed daemon again by running the following command: sudo systemctl start fr24feed!

Saving settings to /etc/fr24feed.ini...OK
Settings saved, attempting to enable and start the fr24feed service
Enabled fr24feed service...OK
Restarted fr24feed service...OK
All done, you can check the status by using the fr24feed-status command
And that’s it, you’re now a Flightradar24 data provider, with a free business subscription.
Step 3: Checking Flight Tracking Status
Check that everything is working properly with the status command:
fr24feed-status
This should respond with a status report:
FR24 Feeder/Decoder Process: running.
FR24 Stats Timestamp: 2025-04-03 19:19:34.
FR24 Link: connected [UDP].
FR24 Radar: T-EHKD217.
FR24 Tracked AC: 10.
Receiver: connected (3559915 MSGS/0 SYNC).
FR24 MLAT: not running ... failed!
You should expect the failed MLAT status if you opted not to perform multilateration (MLAT) calculations.
Step 4: Start and Enable FlightRadar24
To start the FlightRadar24 feeder software, use:
sudo systemctl start fr24feed
Enable it to start automatically:
sudo systemctl enable fr24feed
Step 5: Verify FlightRadar24 is Running
Check the status with:
sudo systemctl status fr24feed
You should see “active (running)” in the output:
* fr24feed.service - Flightradar24 Decoder & Feeder
     Loaded: loaded (/etc/systemd/system/fr24feed.service; enabled; preset: enabled)
     Active: active (running) since Wed 2025-03-26 10:52:27 CET; 1 week 1 day ago
Step 6: Monitor FlightRadar24 on Raspberry Pi 5
Access the local web interface at:
http://localhost:8754
Check your feed statistics and adjust settings as needed.

By default, you can only access the web interface from the host Raspberry Pi 5. You need to set the port binding to allow other devices on the network to connect.
Edit the configuration file:
sudo nano /etc/fr24feed.ini
Add the following line to the file:
bind-interface="0.0.0.0"
Save the file then restart the service:
sudo systemctl restart fr24feed
Now we can access the web interface over the local network:
http://allsky.local:8754
Check your feed statistics and adjust settings as needed. Click the link to show tracked aircraft.

Step 6: Track Aircraft on the FlightRadar24 Website
The local web interface is useful, but you will find the true experience of aircraft tracking on the FlightRadar24 website, using your free business subscription:

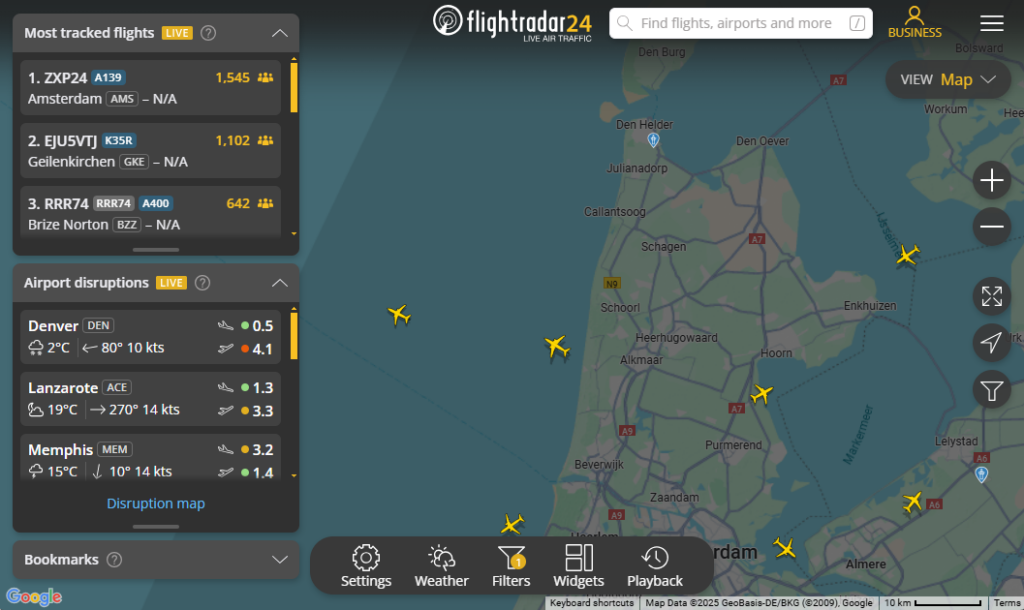
Use the Filters option at the bottom to see just the aircraft currently being tracked by your own radar station:

Step 7: Matching Aircraft using FlightRadar24 Playback
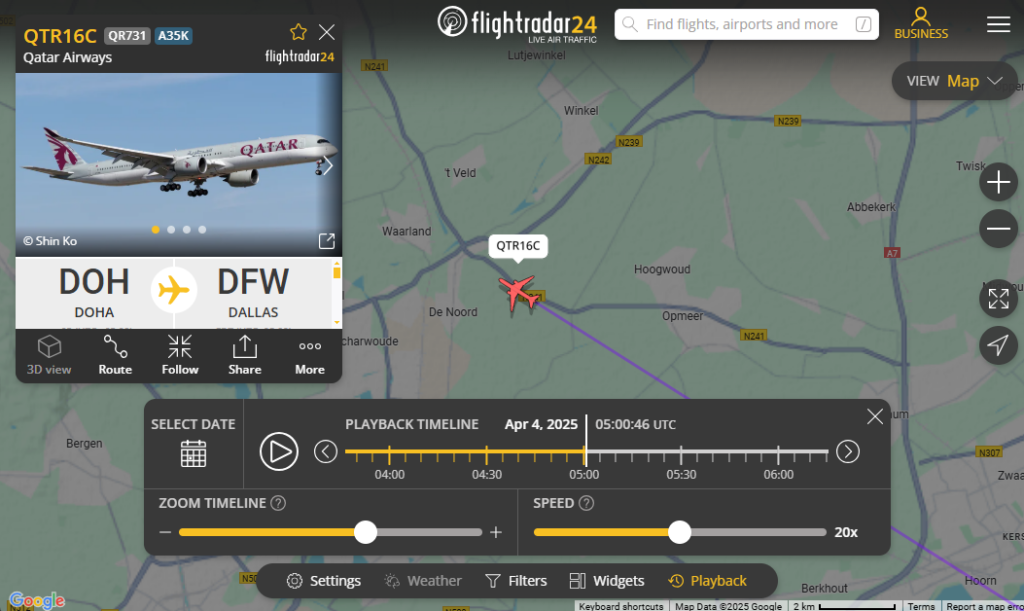
Flightradar24 includes a playback function to show aircraft positions at any given time, and to play back and forward from that time at different speeds. This helps to identify aircraft captured during timelapse:

The playback function uses UTC, so be sure to adjust from AllSky’s capture time, in this case minus two hours from CEST to UTC:

Conclusion
Installing and configuring FlightRadar24 on a Raspberry Pi 5 is simple. Follow these steps to start tracking aircraft today!
Clear skies!
