There are times when your Raspberry Pi 5 cannot connect to a known wireless network. This often happens when you’re engaged in astronomy in the field and away from home. So how can you connect to your Pi wirelessly to either operate directly or configure it to use an available wireless network?
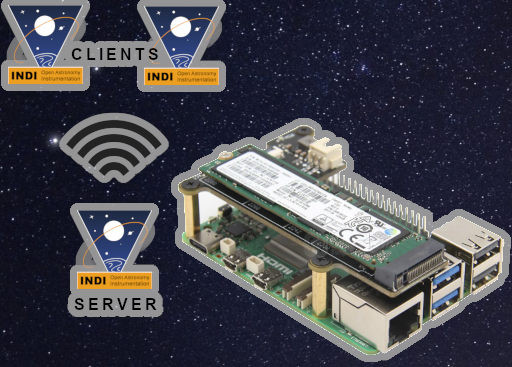
In this guide, we’ll walk through the steps to configure a Raspberry Pi 5 as a fallback wireless access point (AP) hosting an INDI server. This allows you to connect to it wirelessly whenever a known wireless network is no longer available.
Prerequisites:
Before getting started, ensure you have the following:
- Raspberry Pi 5 with Wireless LAN enabled running in desktop mode.
- Ethernet cable for initial setup
- INDI server installed on the Raspberry Pi 5. If you haven’t done so already, check out our post Harnessing Astronomy with Raspberry Pi 5: Installing INDI for Stellar Exploration
Step 1 : Setting Up the Raspberry Pi as a Wireless Access Point
For this initial configuration, you should connect your Raspberry Pi 5 to your ethernet using a fixed cable. Alternatively, you should have access to a console running a desktop environment.
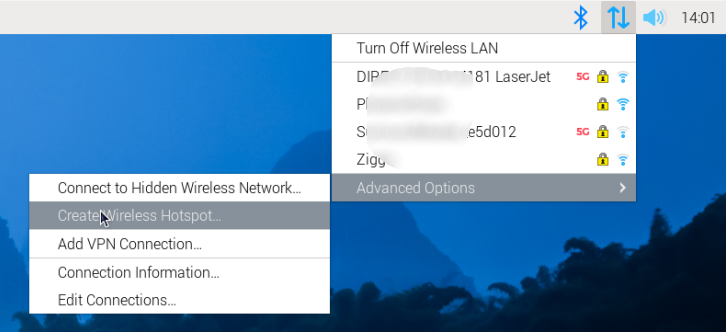
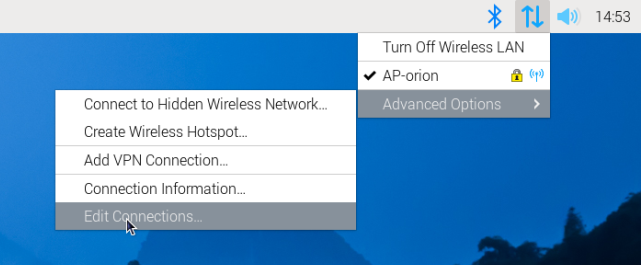
From the default desktop environment, click the network icon in the top right of the display. Then hover over Advanced Options to open the sub menu and click on Create Wireless Hotspot…:
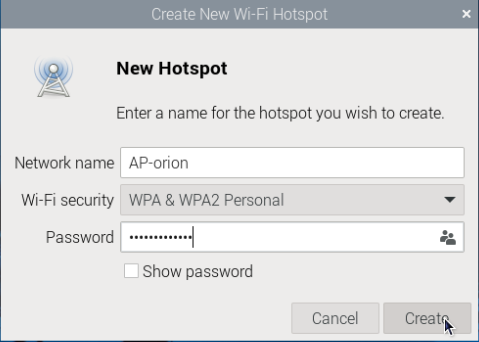
Provide a Network Name that you will use to connect from your other devices. Then set the required security level, which we recommend to be WPA & WPA2 Personal. Provide the Password you will use to connect. Finally, click on the Create button.
Your Raspberry Pi 5 will automatically disconnect from any connected wireless network and reconnect to your new wireless access point.
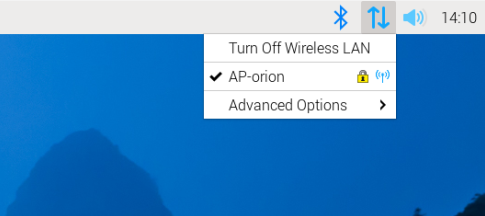
Clicking on the network icon again should show your new wireless access point connected and available for your other devices to connect to. However, you will no longer be able to connect to a wireless network from your Raspberry Pi 5 when you are in access point mode. Therefore, we no longer show any previously listed available wireless networks:
If you do need to connect to some other wireless network, just click your connected wireless access point and disconnect. All available wireless networks, including your new access point, will now be available for you to connect to. Your access point will now disconnect any devices that were connected!
At this point, the system automatically assigns the IP address for the new access point from the class A private network range (10.0.0.0 to 10.255.255.255). This may be difficult to remember, so you will probably want to use an address that is more memorable. Click the network icon again, hover over Advanced Options to open the sub menu, then click on Edit Connections…:
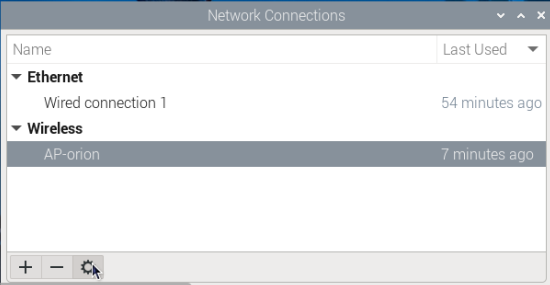
From the list of network connections, select your wireless access point name before clicking the cog button:
In the edit form, click the IPv4 Settings tab and ensure the Method is set as Shared to other Computers. Then click the Add button to add an entry line. Fill in the details of the entry using an IP address range that you can easily remember. In this example, we will use a typical Class C private gateway address of 192.168.0.1 with a net mask range of 24 (255.255.255.0). You use this address and mask to determine the address range that will be issued to any devices connecting your access point. You can leave the Gateway empty:
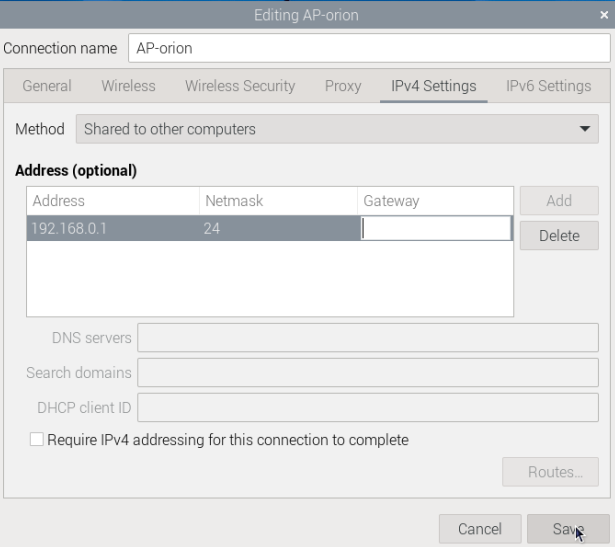
Hit the Save button.
We want to enable our wireless access point by default when we’re out in the field. So, we set this by clicking the General tab and checking the Connect automatically with priority option. Set the priority value to 0:
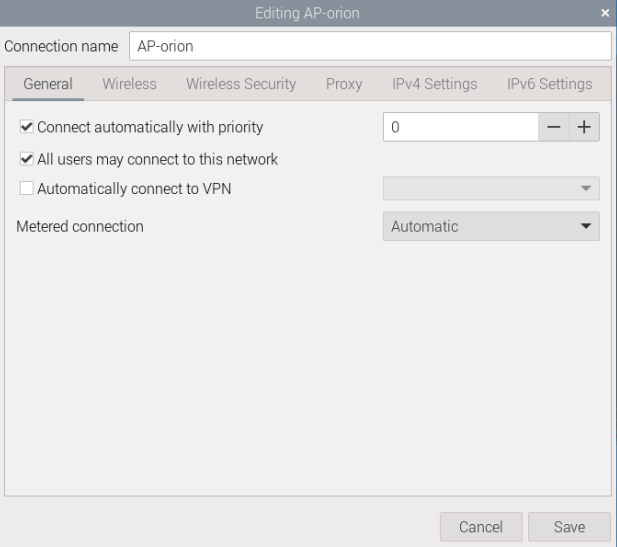
Hit the Save button.
Close the Network Connections panel to complete the wireless access point configuration. Then disconnect and reconnect your access point to see the newly assigned IP address. Reboot your Raspberry Pi 5 and then test and validate your wireless access point configuration by connecting a device.
Step 2 : Connecting to the Raspberry Pi 5 Access Point from another Device
Now that your Raspberry Pi 5 acts as a wireless access point, you no longer need both devices to connect to the same network. This can be wirelessly or wired through a router or any other type of wireless access point. To access directly from your device, open the network connections page. Look for the name you gave to your Raspberry Pi 5 access point in the list of available networks. Then connect to it providing the password you configured earlier.
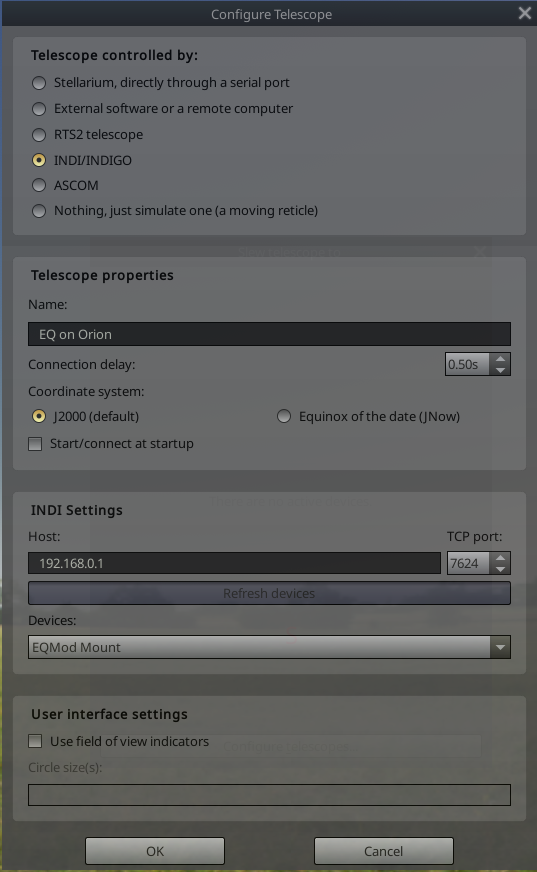
Now you can configure your INDI client applications to wirelessly access your INDI server running on your Raspberry Pi 5. Provide the IP address of the access point in the INDI server connection details. The configuration below is from Stellarium running on a Windows 11 laptop. It is directly connected to the Raspberry Pi 5 wireless access point.
Conclusion:
You’ve successfully configured your Raspberry Pi 5 as a wireless access point. This setup allows astronomers to connect to their observatory equipment wirelessly within the wireless network created by the Raspberry Pi. By hosting an INDI server on the Pi, you can remotely control your astronomical devices. This makes your stargazing experience more convenient and enjoyable. Happy observing!
Hi, I want to use both AP and WiFi mode at the same time, is that possible with this setup?
Hello Ethan, this depends on the type of wireless adaptor. The adaptor that comes with the Pi 5 has a single channel but you could add a wireless USB dongle for more channels and configure each for different modes.