If you’re looking to remotely access your Raspberry Pi 5 using a graphical desktop environment, XRDP is one of the most convenient tools to set up. XRDP allows you to use the built-in Remote Desktop Protocol (RDP) available on most operating systems like Windows, macOS, and Linux to connect to your Raspberry Pi remotely. In this blog post, I’ll walk you through the steps to install and configure XRDP on a Raspberry Pi 5, so you can easily access it from any device.
Step 1: Update Your Raspberry Pi OS
Before installing any new software, it’s always a good idea to update your Raspberry Pi OS to ensure everything is up-to-date.
Open a terminal on your Raspberry Pi (or SSH into it from another device). Run the following commands to update the package list and upgrade any existing packages:
sudo apt update && sudo apt upgrade
Step 2: Install XRDP
XRDP is available in the default Raspberry Pi OS repository, making installation quite simple. Open a terminal and install XRDP by running the following command:
sudo apt install xrdp
Once installed, the XRDP service will start automatically. You can verify it’s running with:
sudo systemctl status xrdp
You should see a message indicating that XRDP is “active” and running.
Step 3: Connect to the Raspberry Pi via Remote Desktop
Now that XRDP is installed and running, you can connect to your Raspberry Pi using any RDP client. Here’s how:
On Windows:
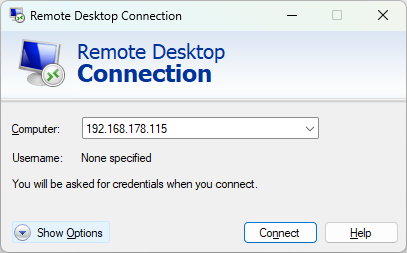
- Open the Remote Desktop Connection app (press
Win + Rand typemstsc). - Enter the IP address of your Raspberry Pi.
- Click Connect.
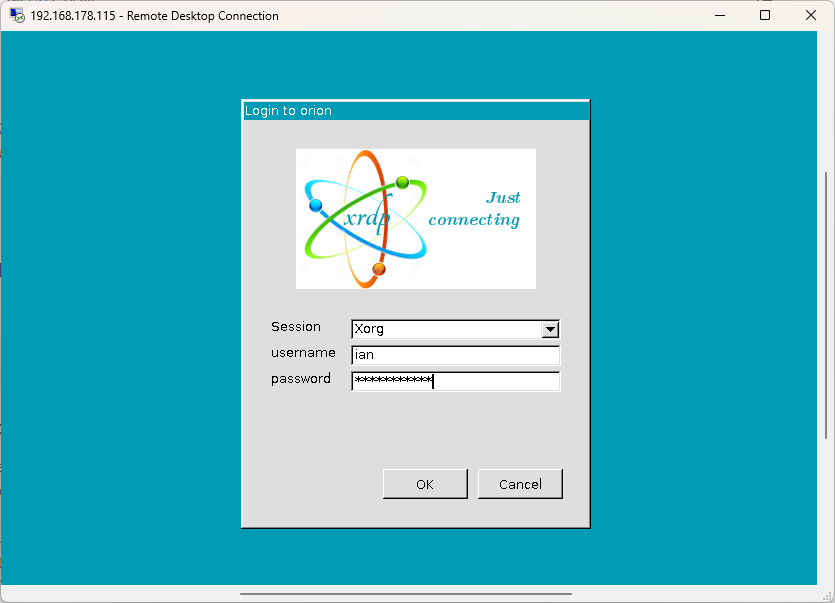
- When prompted, enter your Raspberry Pi’s username and password.
- You should now see your Raspberry Pi’s desktop on your Windows PC!
On macOS:
- Download and install the Microsoft Remote Desktop app from the Mac App Store.
- Open the app and click Add PC.
- Enter the Raspberry Pi’s IP address and click Save.
- Double-click the connection, and when prompted, enter your Raspberry Pi credentials.
- You should now see your Raspberry Pi’s desktop.
On Linux:
- Install an RDP client like Remmina:
sudo apt install remmina - Open Remmina, select RDP, and enter your Raspberry Pi’s IP address.
- Connect and enter your credentials when prompted.
Step 4: Managing Authentication Policies
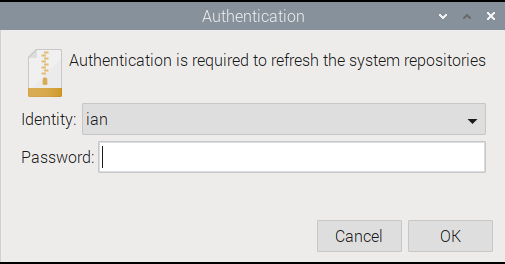
The Raspberry Pi 5 implements a toolkit called Polkit (previously PolicyKit) to define and handle security authorizations. It is used for allowing unprivileged processes to speak to privileged processes. Sessions connected to a Raspberry Pi 5 using console access implement a different authorisation policy to those connected over distributed sessions such as XRDP. This results in authorisation prompts when the system tries to perform an action that requires elevated authorisation:
To prevent these authorisation prompts we need to change the authorisation policy for distributed sessions. We can see which policies are used for the package kit system sources (repositories) refresh action using the following command:
pkaction --action-id org.freedesktop.packagekit.system-sources-refresh --verbose
org.freedesktop.packagekit.system-sources-refresh:
  description:       Refresh system repositories
  message:           Authentication is required to refresh the system repositories
  vendor:            The PackageKit Project
  vendor_url:        https://www.freedesktop.org/software/PackageKit/
  icon:              package-x-generic
  implicit any:      auth_admin
  implicit inactive: yes
  implicit active:   yes
The implicit active setting applies to console sessions, so allowing elevated authorisations. The implicit any setting applies to any other session type including XRDP, and required administrator authorisation. We can create a new rule for XRDP to change these settings for the package kit action:
sudo nano /etc/polkit-1/localauthority/50-local.d/10-enable-system-sources-refresh.pkla
Edit the file with the following:
[Allow System Repository Refreshes]
Identity=unix-user:your-username
Action=org.freedesktop.packagekit.system-sources-refresh
ResultAny=yes
ResultInactive=yes
ResultActive=yes
Change the username in Identity=unix-user:your-username to you own username, e.g. Identity=unix-user:ian
Save file file then restart the XRDP service:
sudo systemctl restart xrdp
Now the authorisation prompts are not shown anymore. You will need to repeat this exercise for any other unwanted elevated authorisation prompts, such as when performing Wifi Scans when using your Raspberry Pi 5 as an access point.
Step 5: Troubleshooting
1. Chromium GPU
XRDP uses a graphics emulator and creates problems for applications relying directly on the Graphics Processing Unit (GPU). Once such application is the Chromium web browser, which fails to display correctly when launched from an RDP session. To fix this, the application should be configured to bypass the GPU. For the Chromium web browser, this means updating the launcher properties:
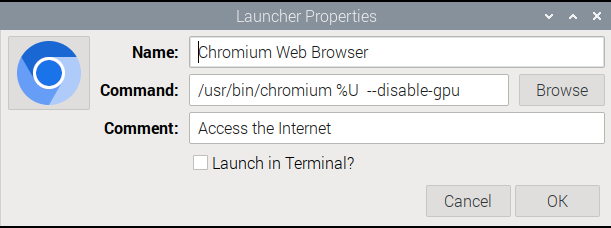
Adding the --disable-gpu parameter to the command solves the problem.
Different applications will use different approaches for bypassing the GPU.
2. GPU Device Permissions
Another common problem occurs when the user connecting in does not have permission to the GPU device, so we can fix that by removing the reference to the GPU device in the XRDP configuration file:
sudo nano /etc/X11/xrdp/xorg.conf
Look for the Section "Device" and Option "DRMDevice" "/dev/dri/renderD128". Comment out the line and add another with the function name removed:
Section "Device"
    Identifier "Video Card (xrdpdev)"
    Driver "xrdpdev"
#    Option "DRMDevice" "/dev/dri/renderD128"
    Option "DRMDevice" ""
    Option "DRI3" "1"
EndSection
Save the file then reboot.
3. Reverting the Wayland Window Compositor
New builds and updates of Raspberry Pi OS now use the labwc window-stacking compositor for Wayland, as an improvement on Wayfire, but this causes problems for XRDP resulting in a black screen at logon. For now, the fix is to revert Wayland to use Wayfire, through the Raspberry Pi Software Configuration Tool.
From a command line, start the Raspberry Pi Software Configuration Tool:
sudo raspi-config
From the menu, navigate to 6 Advanced Options->A6 Wayland->W2 Wayfire:
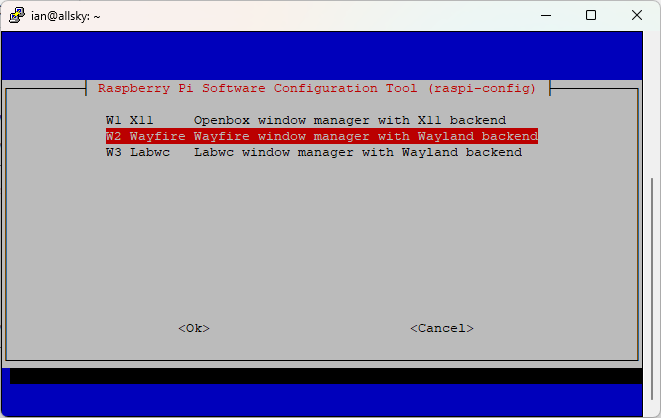
Select OK to save then reboot.
Step 6: Disconnecting and Reconnecting
To disconnect from the session without shutting down your Raspberry Pi, simply close the RDP client on your device. The session will remain active, and you can reconnect later. If you want to log out of the session completely, use the logout option from the Raspberry Pi desktop menu within your RDP session.
Conclusion
XRDP is an easy and efficient way to access your Raspberry Pi 5 remotely with a full graphical interface, no matter what operating system you’re using. By following these steps, you should be able to install, configure, and use XRDP seamlessly. This setup is especially useful if you’re working on projects or need to monitor your Raspberry Pi without the hassle of plugging in a monitor, keyboard, or mouse.
Hi,
are you happy with xrdp on the Pi5 under Raspberry PiOS? I have a Pi5 running Ubuntu 24 LTS, and xrdp uses 100% CPU when I start kstars, so it is essentially unusable 🙁
Hi Matthias, I only use XRDP as my setups are remote and I have never had the issue that you report.